
Block system in Drupal allows us to add content into regions. A block could be text or listing of content using Views.
In Drupal 7, lock options were limited. One block can only be assigned to a single region and have very basic control of hiding and displaying it.
To overcome these limitations in Drupal 7 we had option to use Panels to add fields to blocks.
In Drupal 8, the Block system became more flexible. Biggest improvements are - assigning single block to multiple regions and fieldable block types.
In this article, we'll show you How to work with new Drupal 8 block architecture. We'll be adding a block that will only appear in the sidebar of Article pages. Then we'll create a custom block type which will be used to create reusable promotional content. This can be added to any blog post.
A list of new things introduced in Drupal 8 block architecture -
- Blocks in general can be used multiple times.
- Block title has now on/off option.
- Easier and improved UI for new blocks.
- Configurations of block types and layout are now in code!
- Permissions are still limited
- and now we have fieldable block types.
Lets’ Begin!
In Drupal 7, the Block module handles placement of a block and allow you to create static blocks. In Drupal 8, it has been separated out into two different modules.
The Block module handles placement of the block and "Custom Block" module implements a new entity which allows you to create block content. We can create different block types and they're fieldable.
How to create a Static block and configure it?
Step 1: Go to Manage >> Structure >> Block Layout >> Custom block library
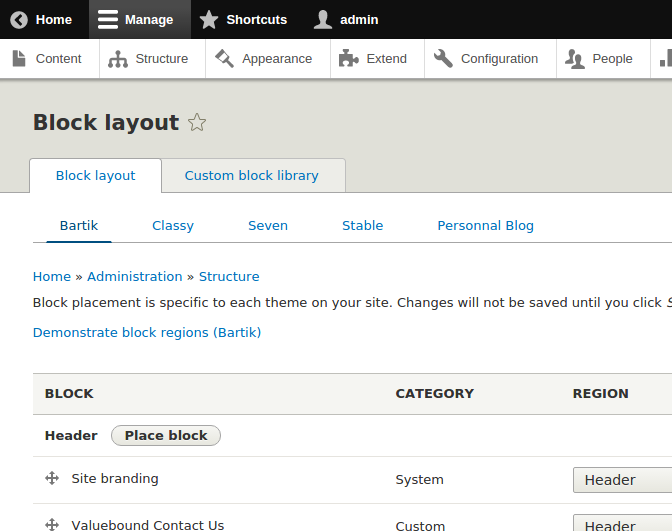
This page has Two tab Blocks and Types. lick on +Add custom block or custom block link visible on the same page.
Step 2: This page is similar to Drupal 7 block creation page which has block description with body field and Revision information.

Fill all the field values and click on Save button.

Step 4: Once the block has been created you'll be redirected back to the "Custom block library" page.
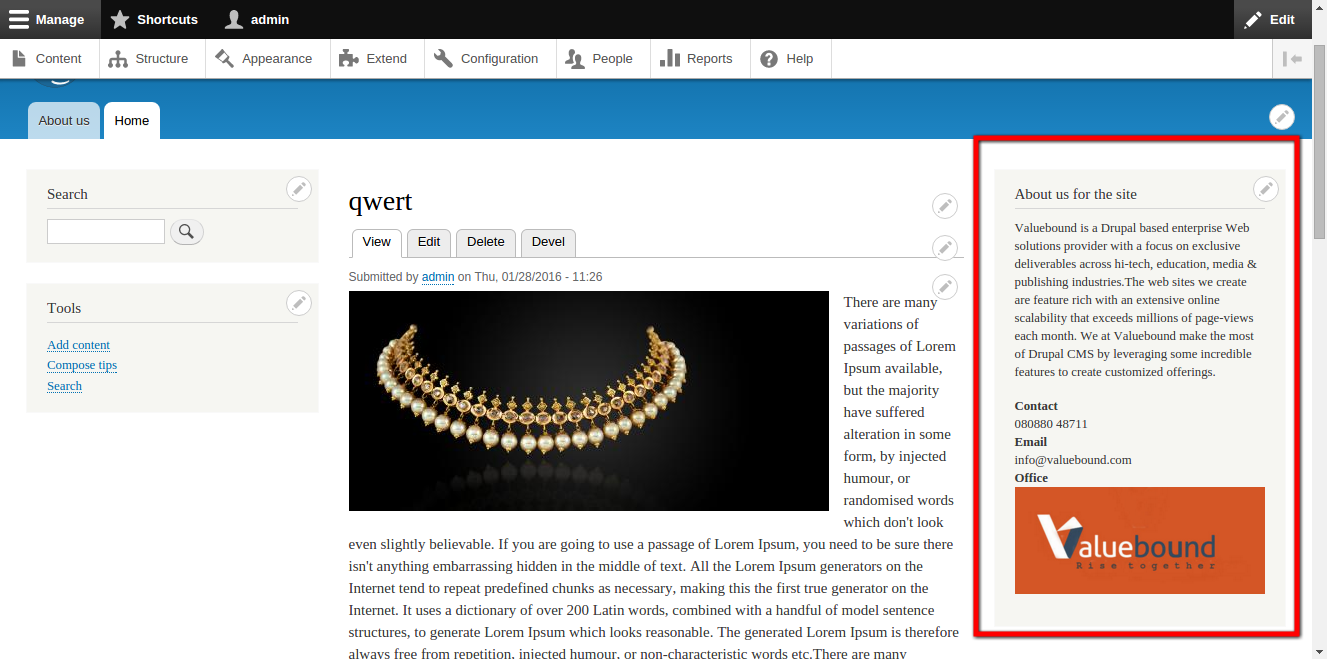
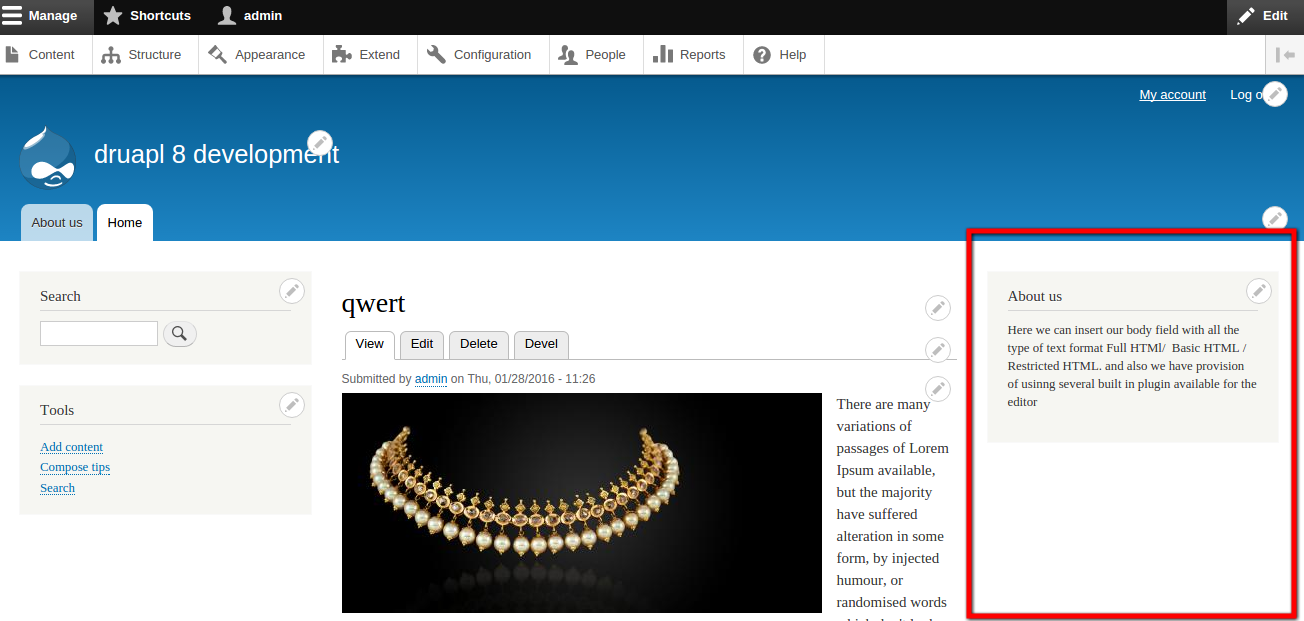
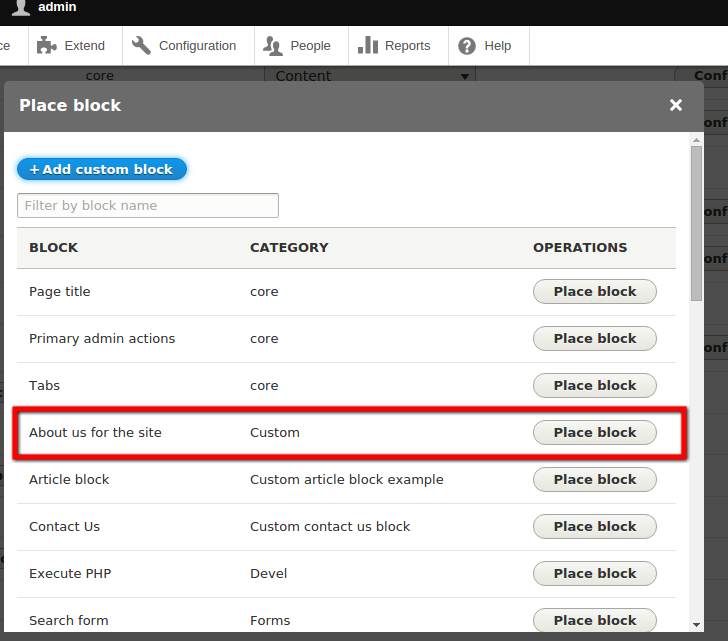
At this point the block is disabled and needs to be added to a specific region. Click on the "Block layout" tab and scroll down to "Sidebar second" and click on "Place block".

Step 5: Clicking on “place block” will redirect you to the block configuration page. Here we have title field with new enable/ disable option, which is newly introduced in Drupal 8. We still have visibility setting based on Content type, pages, roles and region assignment as it was in Drupal 7.

we have assigned our new block “About us” to Sidebar second region. We can view our custom block to sidebar second in the site.
2. Custom Block Content
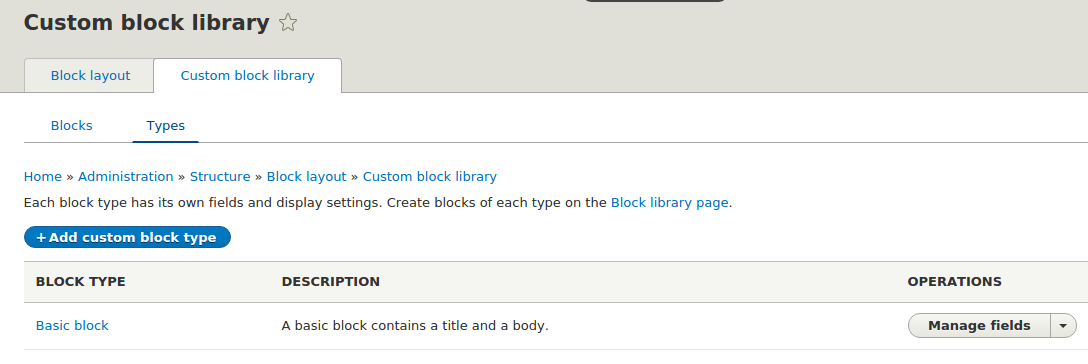
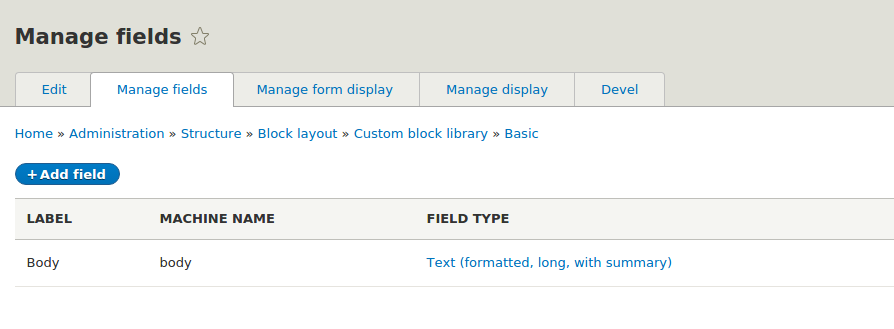
In Drupal 8 "Custom block" allows you to create the actual block content and custom block types. By default you get a block type called "Basic block". This type is very basic and has a single field: the Body field.
Step 2.1: Go to Manage >> Structure >> Block Layout >> Custom block library >> Types
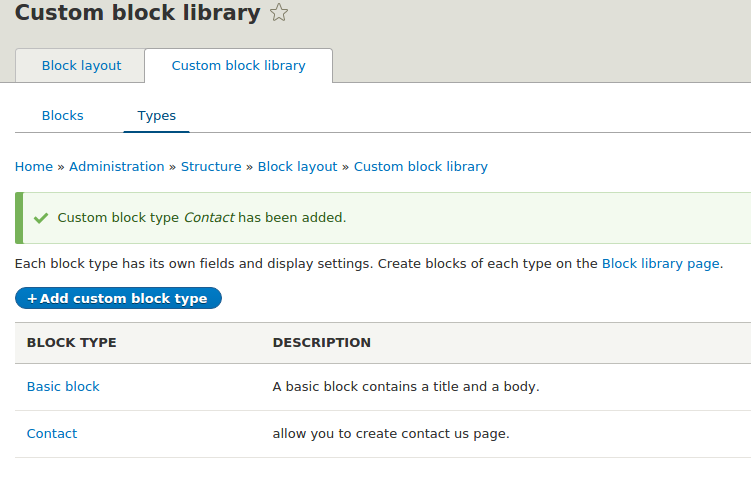
Step 2.2: Clicking on ‘+Add custom block type” will enable you to create block content type. Fill up label and description, check revision if you wish to and click on Save button.

Step 2.3: Now, we can view our new Block Content type is listing under admin/structure/block/block-content/types.
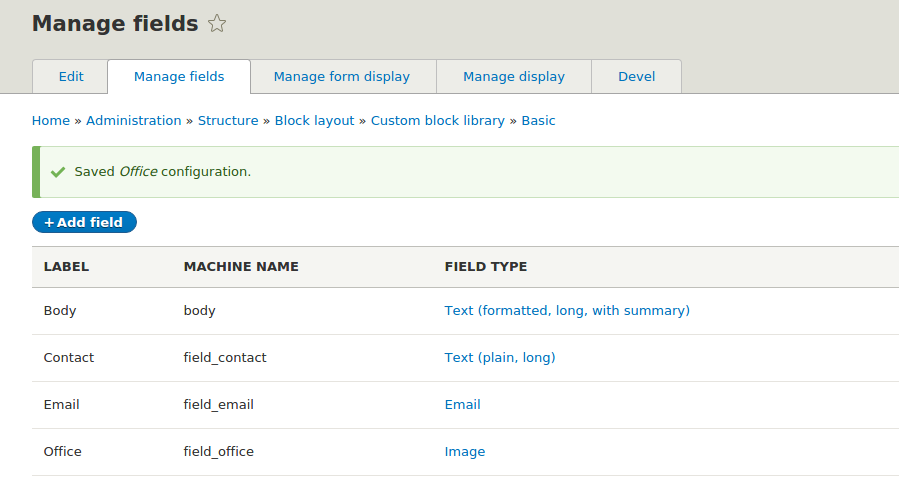
Step 2.4: Next step is to adding fields to Block content type. Click on “Manage field” and add fields. This is similar to adding fields to content type.
I have added few of the fields to provide additional data to the content.
Step 2.5: Once new Block content type has been added, it will start listing on block add page.
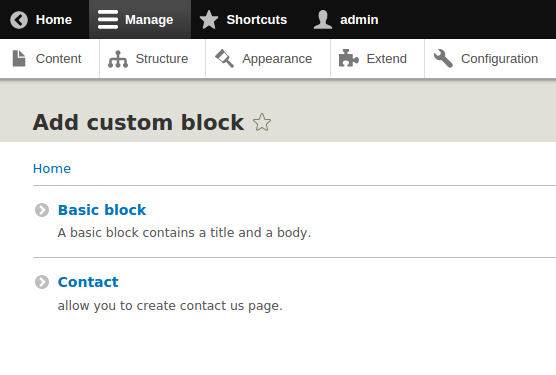
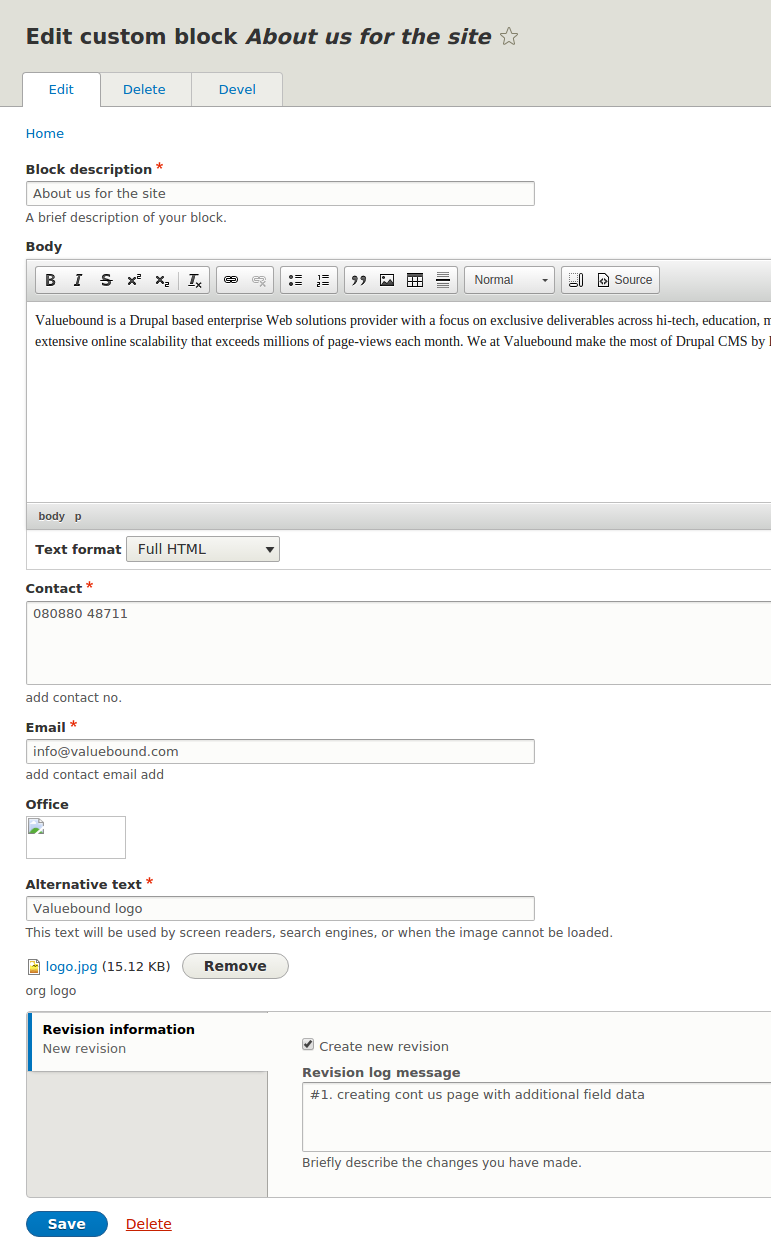
Click on “Contact” and fill up detail.
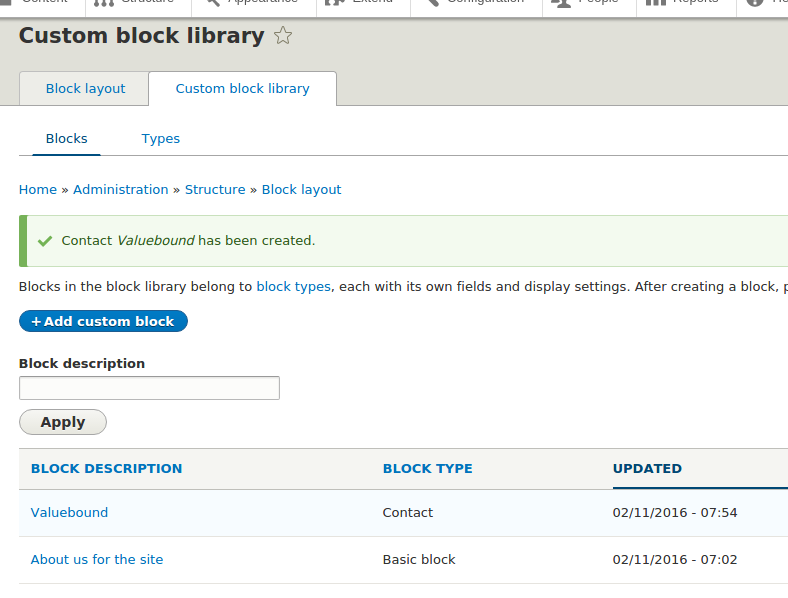
Step 2.6: Once the block is created, it will be listed here.
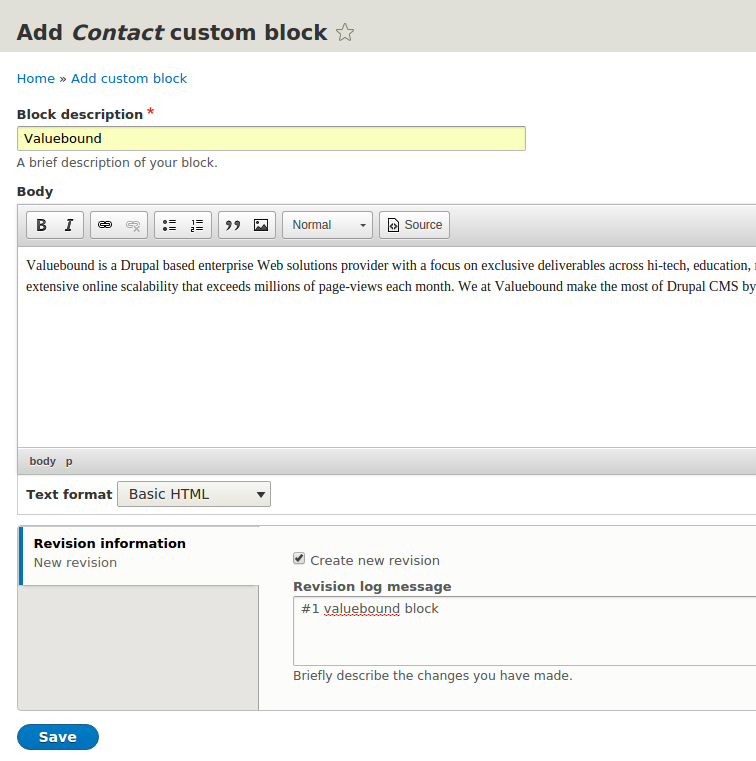
Step 2.7: Click on your custom block and fill up the required details and save it .
Step 2.8: Now, it’s time to place our new block.
Go to Block layout. and click on “place block” under any of the region. In below screenshot i am assigning the custom block to “Sidebar first”
Step 2.9: Proceed with basic block configuration and click on save block.

we have completed configuration with placement of new custom block. We can view this in our web site.