As a Drupal professional you might have heard of Flood Table (user session management) but didn’t give much thought to it.
Having little theoretical knowledge of the core behavior of Drupal is not bad. So allow me to explain what user session management is all about? And how it can protect you from bot or malware. I will also share few #Tweaks that help you to understand how to Flood & Unblock user from your site.
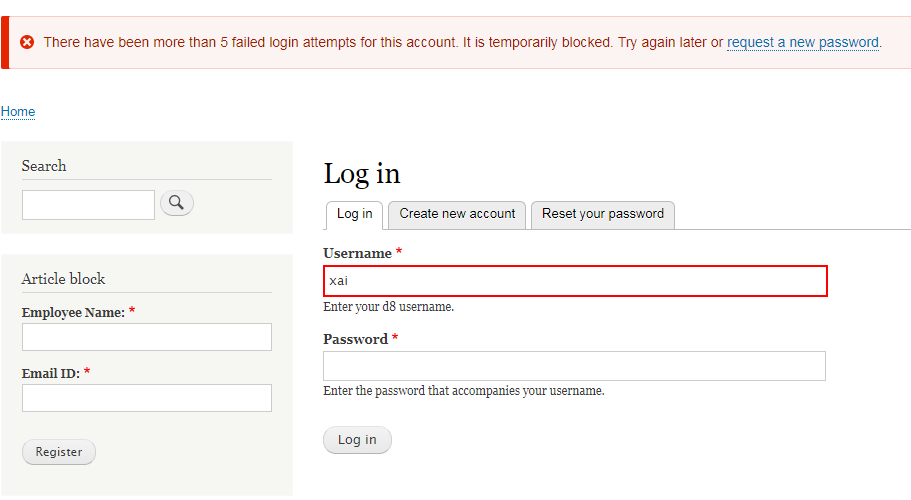
Drupal 6 does not provide security from login attempt attack from Core until you enable login security contributed module. In Drupal 7, however, the core has an in-built functionality to handle user account attack whether it is a bot or some sort of malware. In this scenario, Drupal protects your account from multiple hits either from one user id or one source ip.
Drupal protects your site in two different ways:
- Failed login user id
- Failed login source IP
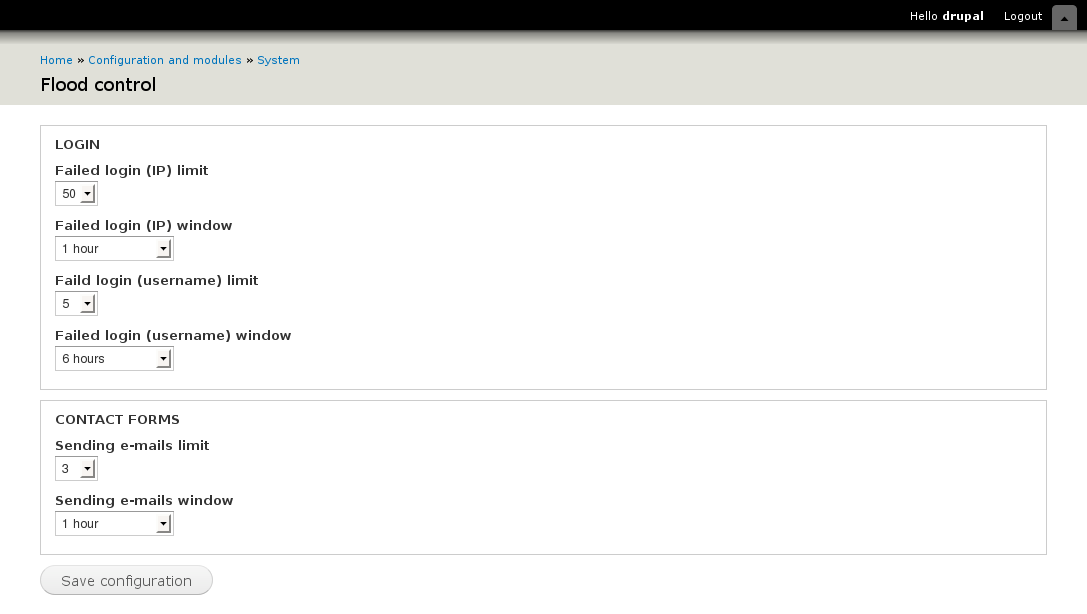
Drupal blocks particular user from login if he/she attempt to log in for more than five times within a time span of six hours, and source IP if there is 50 failed attempt within an hour. These data get stored in Flood Table provided by Drupal core.
As shown below, we have event id (fid), event (user logged in attempt IP/logged in attempt by user id), identifier (value for logged in user ID/IP), timestamp (event occurrence unix timestamp), expiration (Expiration timestamp. Expired events are purged on cron run.)
The Table helps you to view locked user IP & ID on the Drupal website. In Drupal 8, you won’t find ‘FLOOD’ table by default until any of the user lock/user IP event occurs. Thereafter, Drupal create FLOOD table.
Below is the Drupal 8 Table structure of Flood.

Let’s say you, as an admin, have been blocked due to multiple wrong password entry. And unfortunately, you don’t have a mail server installed on the web so that you can request for Password Reset.
In this case, you can Reset your password by running Drush command. If, somehow, you remember your password, but unable to log in due to multiple false attempts then clear your flood table first.
When your account is locked, visit phpmyadmin using UI or log in to mysql or relevant database as a root user then search for Flood Table and clear the respective user ID/IP.
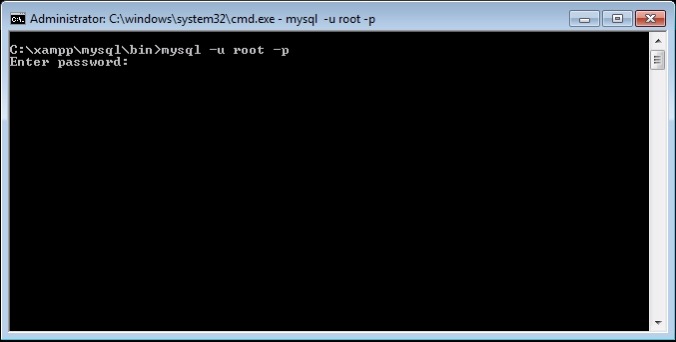
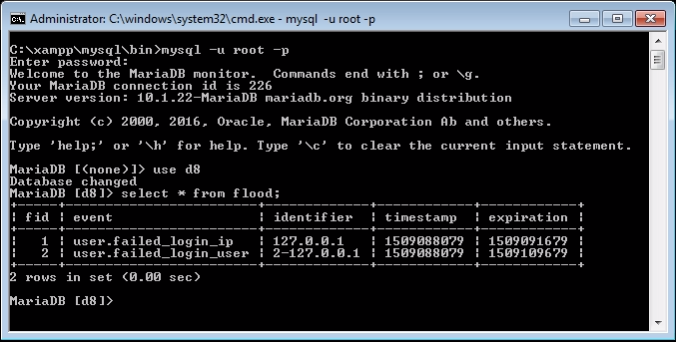
Open related database. Look for Flood table and delete specific user row from Table entry. As you can see above table having two entries.
- User.failed_login_ip: Display user attempt was made from the IP address (127.0.0.1).
- User.failed_login_user: Display user ID & hit by source IP address (2-127.0.0.1).
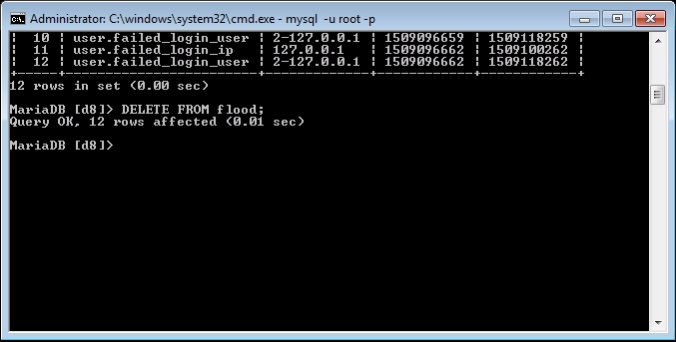
The flood table has been cleared from the terminal and you have deleted specific user or IP. Now you can log in to your Drupal website. So simple.
Let’s view the same scenario another way around.
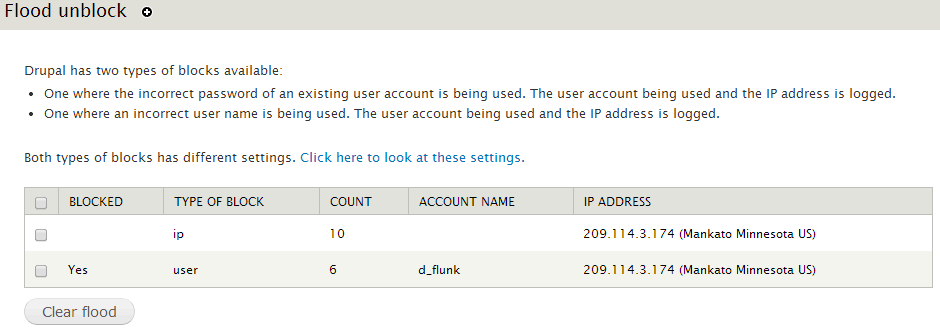
You don’t have ssh/putty access, but you have admin rights and you want to unlock one of the user account, who is blocked due to multiple false attempts. In this scenario, you can download & install Flood Unblock & Flood Control module.
Drupal Flood Unblock provides an interface to the admin so that she/he can unblock user ID/IP either in bulk or individually. Use the following Drush command to clear user ID/IP:
drush flood_unblock all
drush flood_unblock ip
drush flood_unblock user
Drupal Flood Control holds additional configurations to manage Failed IP limit and Failed user limit with the time range. Set this configuration as per your feasibility and save the configuration.
Locking mechanism is being handled by Drupal user_login_authentication_validate()
// Set per-IP Drupal failed login attempts limit and window.
variable_set('user_failed_login_ip_limit', 50);
variable_set('user_failed_login_ip_window', 3600);

// Set per-user Drupal failed login attempts limit and window.
variable_set('user_failed_login_user_limit', 5) ;
variable_set('user_failed_login_user_window', 21600);
Run the following commands:
To Reset user password using drush:
drush user-password USERNAME --password="SOMEPASSWORD"
or
drush upwd USERNAME --password="SOMEPASSWORD"
To Reset user password using Drupal Console:
drupal user:password:reset
To Reset user password using SQL-Query:
Generate hash code for your new password. By running one of the commands in the Drupal root directory:
./scripts/password-hash.sh newpwd
For Windows user:
php .\scripts\password-hash.sh newpwd
Once received encrypted password, execute sql query to run password update. And DONE.
UPDATE users SET pass
='$S$CTo9G7Lx28rzCfpn4WB2hUlknDKv6QTqHaf82WLbhPT2K5TzKzML' WHERE uid = 1;
So far we have checked out functionality, mechanism, and recovery of Flood and Table structure. Here are few tips that will help you to protect user account especially admin account that every hacker tries to attack.
- Do not give admin username as an admin.
- Don’t allow the user to view username of admin.
- Hide confidential data like username from an anonymous user.
- Enable notification via mail/sms if super user logged in.
- Block uid =1 if no more required. & enable it in temporary, if they required it.
That’s it! This is all about Flood Table.
Okay, so you know what is the purpose of Flood Table and you're convinced that you've got something new to learn. The goal of our blog post is to bring you valuable information to help out in difficult situations and grow your business. Hope you enjoyed this post! Please comment below and let me answer in case you have any doubts.
