

The best way to communicate with online reader is allow them to give feedback or add comment on your article. Comments are great way for communicating with readers and the community.
The functionality has changed a lot in Drupal 8. In Drupal 7, the comments system was quite simple. You could use them on content types and have only one single comment type. But what about if you want this different comment form for different content e.g. sometimes we need user to add feedback with just two fields, name & message and in another content type we need review system where besides name & message, user should rate the article based on some scale.
To address these limitations, comments system has been rebuilt in Drupal 8. It could be attached to any entity type by adding a "Comments" field. Now you can have multiple comment types. This also help us to differentiate many type of things like having public /or private comments on a single bundle.
In this Tutorial we are going to explore:
- Adding Comment to Content Type
- Creating Different comment Types
1. Adding Comment to Content Type
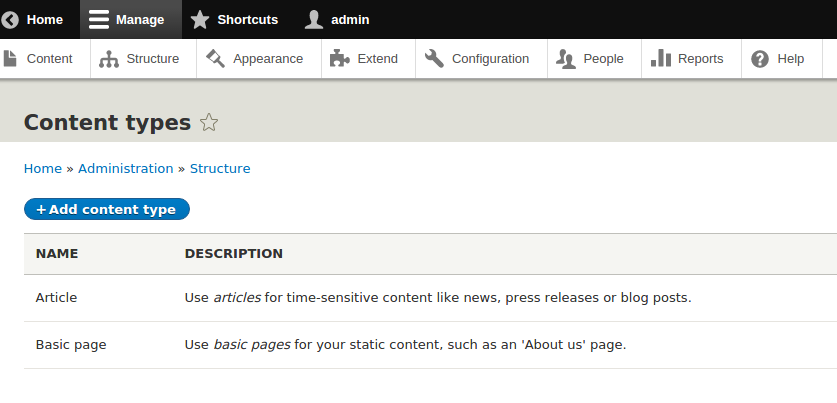
Step 1.1: Go to Manage >> Structure >> content type and select Article content type & click on Manage fields.
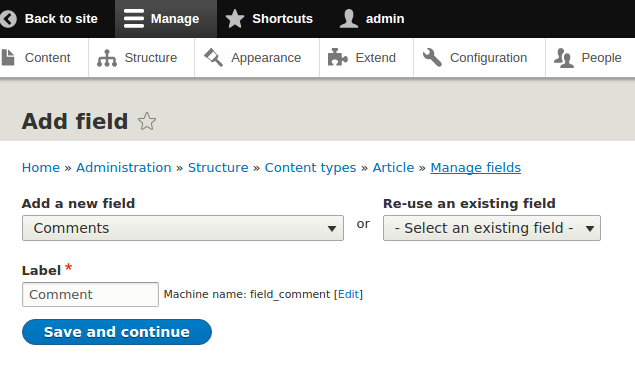
Step 1.2: Click on +Add field. ou will be redirect to Add field page where you can select comments as new field or you can just Re-use an existing field from your site.
Add the label name and click on Save and continue.
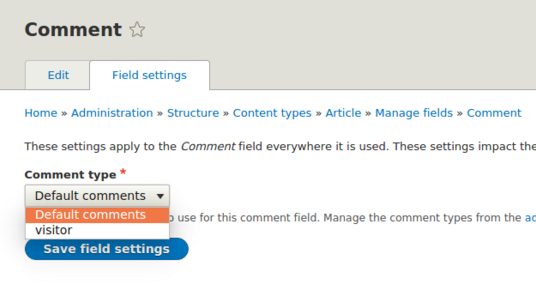
Step 1.3: Select comment type from the two option - Default comments and visitor. Click on save field settings.
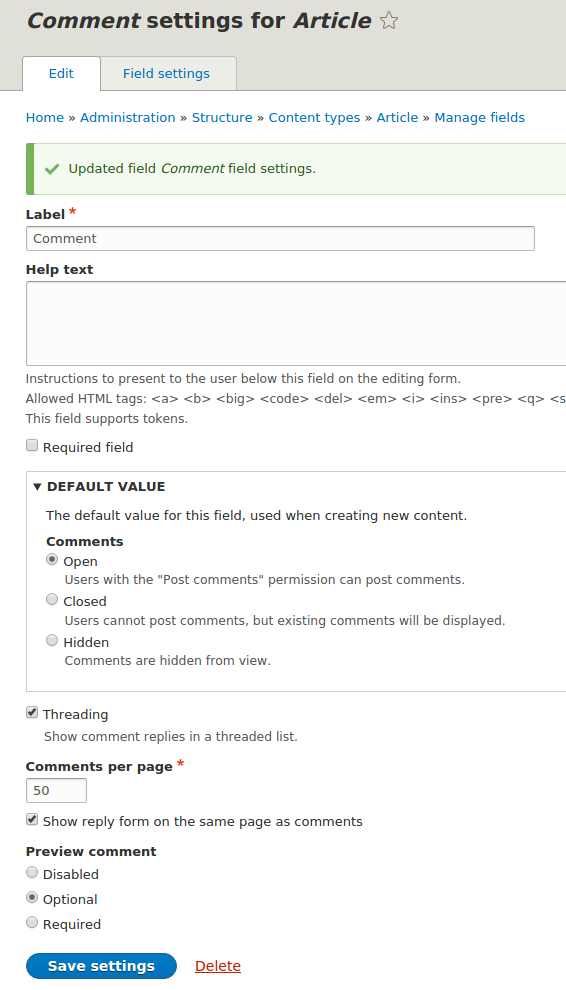
Step 1.4: Add comment setting for Article content type and click on save settings. these settings holds label, help text, required box, Default value (open / closed / hidden), comment per page, comment threading, Preview comment (Disable / Optional / Required). Once you have filled up all the required data click on save settings.
Step 1.5: So, we have selected Comment type as “Default comments”. To check the setting for the same go to /admin/structure/comment and click on manage field under “Default comments” type.
2. Creating Different comment Type
In the previous section we have enabled comment for our content type. Now we are going to create a new comment type itself to be used with another content type.
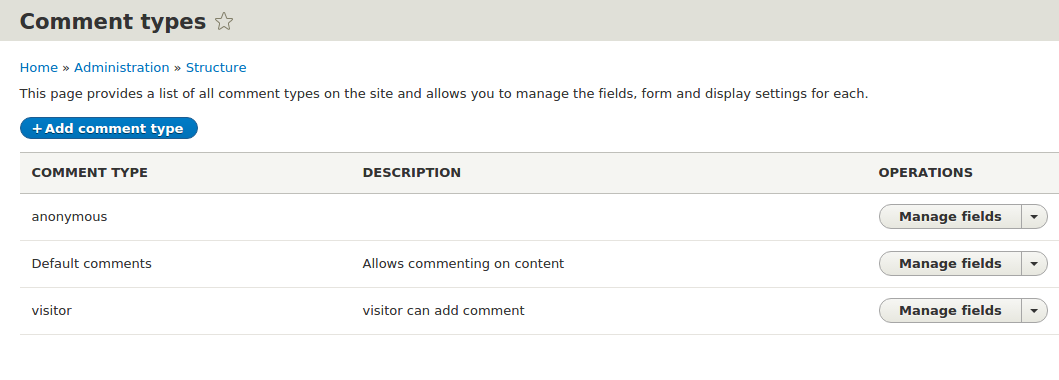
Step 2.1: Go to manage >> structure >> Content types >> comment types
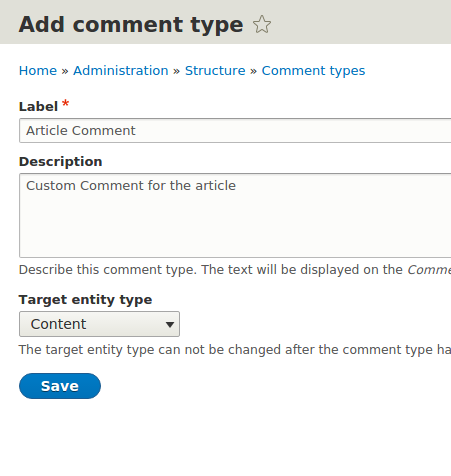
and click on +Add comment type. Fill up label, description, target entity type and click on save.
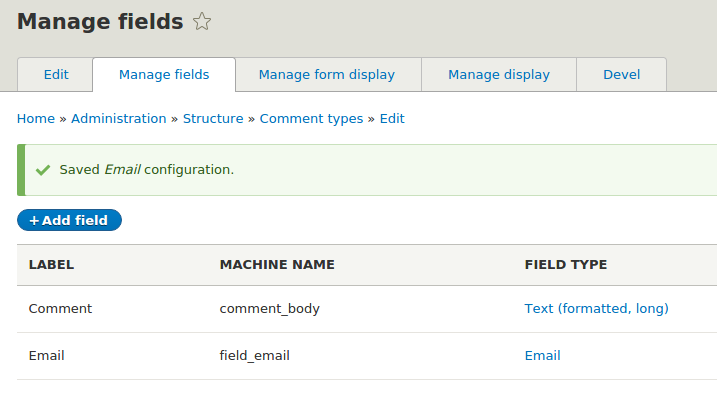
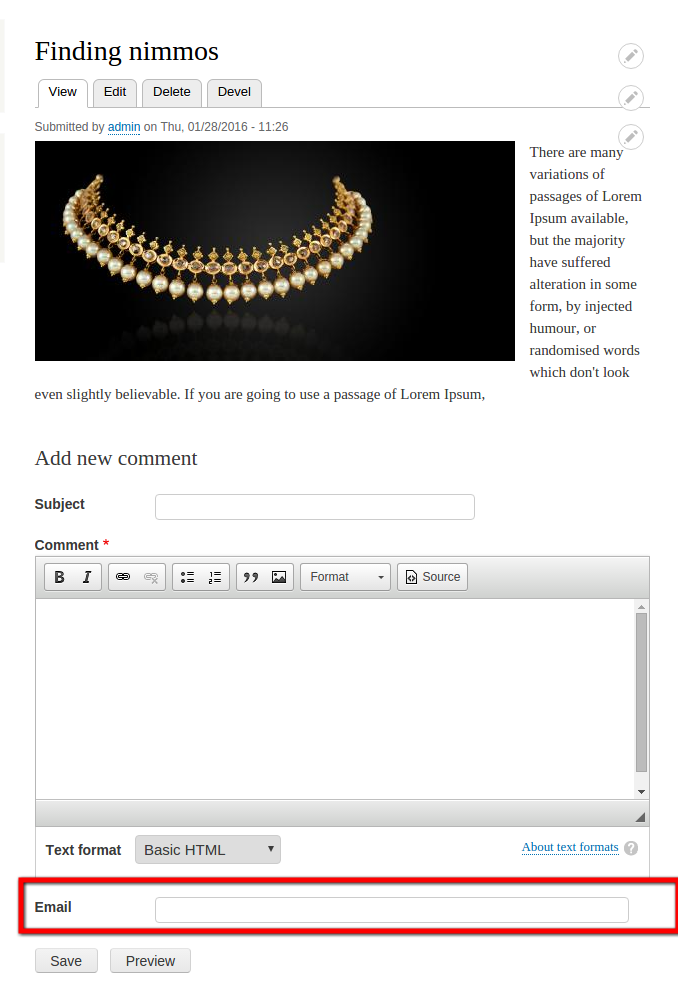
Step 2.2: Once Comment type has been added click on manage fields. Add the choice of field to your comment type. Below I have added Email field.
Step 2.3: Once you have done with adding up new field go to content type listing page and click on manage fields.
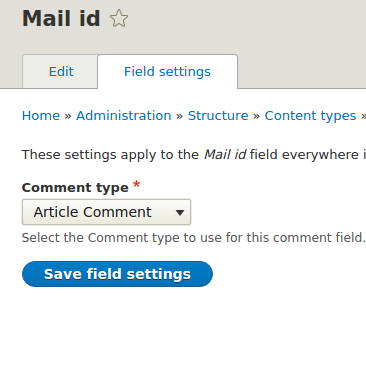
On click of adding comment, you’ll be redirected to comment type selection page, where you can choose your custom comment type and click on save field settings.
Step 2.4: Next is to configure comment for the content type.

Once you have saved the fields, we can view the same by visiting any article. Your article should have custom comment type “Article comment” with additional field Email.
Now you should be able to add new comment types with specific fields for different content types of your project.