

I started working on React Native recently. The very first roadblock I came across was configuring React Native on my machine. Since I had minimal working knowledge of Android studio as well as Node JS it took me a few days to figure this out. I am sharing my learning in this blog post to help you fast track your initial setup.
There are multiple ways to set up a react native environment, such as using Expo CLI or React native CLI. However, this blog gives a glimpse into setting up React native CLI. The development operating system that we shall be using is Windows; meanwhile the Target Operating System will be Android.
For this we need a Code editor like VS code and dependencies (JDK, Node, React native command line interface and android studio).
Here’s your step-by-step guide to set up React Native in Windows using Android Studio and Node.
Step 1:
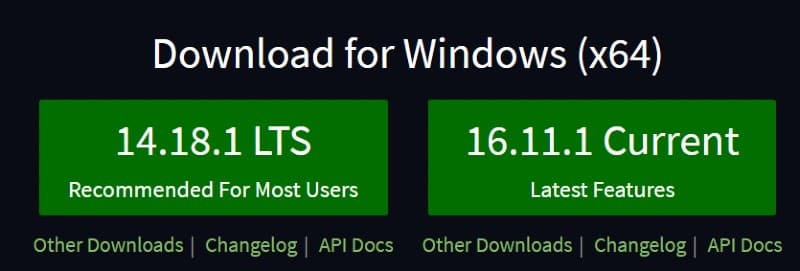
(a) Install Java JDK 15
Use the below link to download Windows x64 installer-
https://www.oracle.com/java/technologies/javase/jdk15-archive-downloads.html
Here’s a screenshot of how this may appear.

(b) Install downloaded JDK by following instructions.
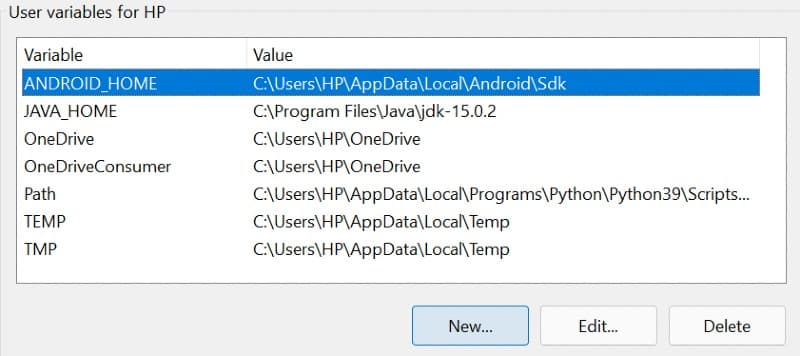
(c) Next we are going to set environmental variable. Press windows key and search “Edit environment variables,” and open it.
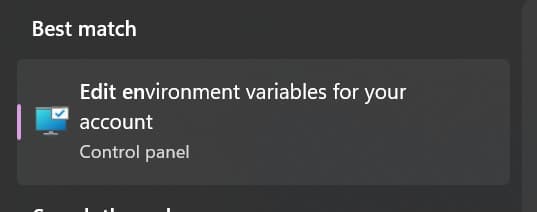
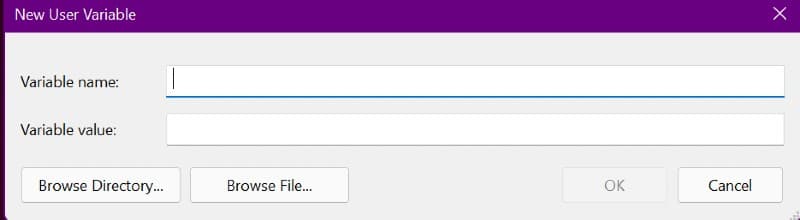
(d) In the User variable section, click new, as shown in the screenshot below.

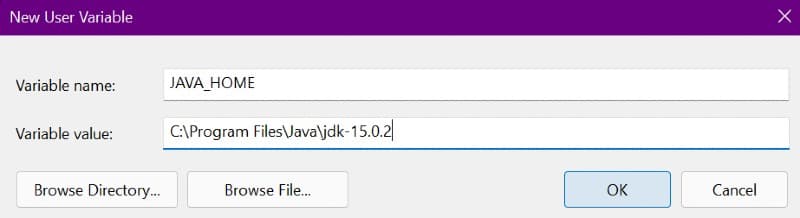
After clicking New, You will get screen like this-

Fill variable name as ‘JAVA_HOME’ (Without single quote).For Variable value, open your C drive -> Program files -> Java -> jdk-15.0.2 and copy that path as shown below.
Variable value : - ‘C:\Program Files\Java\jdk-15.0.2’ (Without Single quote)
Once you press OK, you can see your variable in the user variable section (Refer to the image shown below).
![]()
Step 2 :
(a) Install NodeJs (if not already installed)
Use the link given below to download the LTS version of Node(Recommended).
https://nodejs.org/en/
(b) Install downloaded NodeJs by following instructions.
Step 3:
(a) Install React Native CLI
To do so, follow the below mentioned set of instructions-
- Open Windows Terminal
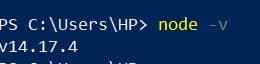
- Run command : - node -v
- Check whether node is installed correctly or not by running command : - node -v
- Run Command : - npm install -g react-native-cli (To install React native CLI)

- Close the terminal
Step 4:
(a) Install Android studio
Use the link given below to download Android Studio-
https://developer.android.com/studio

(b) Install android studio by following below mentioned set of instructions:
- Open android studio and click ‘tools’

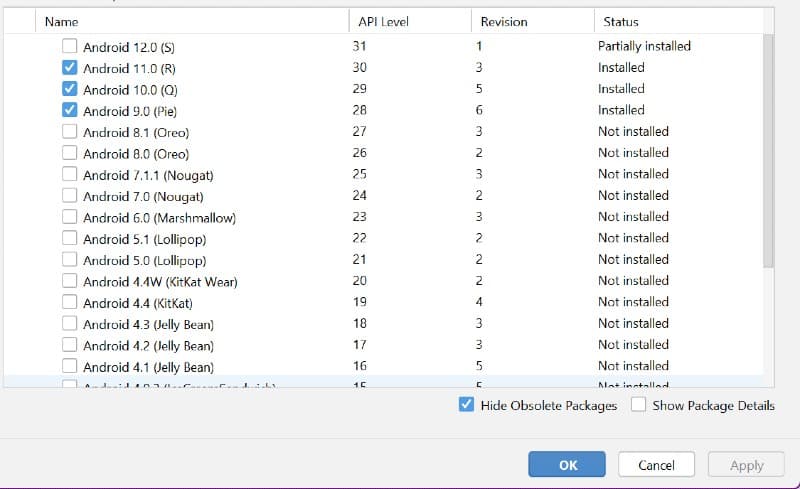
- Now click on SDK Manager
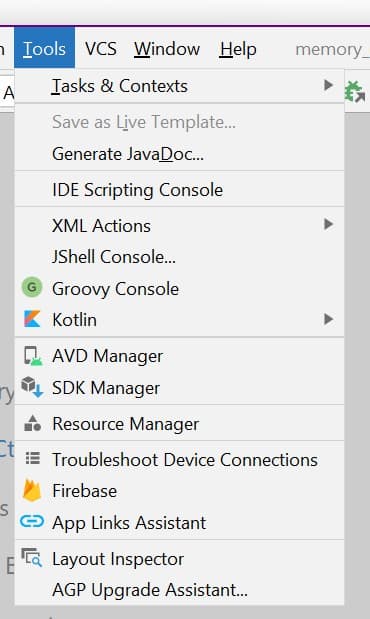
- Install your required android version
- Again click on Tools and open AVD Manager

- Click on ‘Create Virtual Device’
- Choose Device definition and click next
- Choose system image and click next
- Verify configuration and click finish.
Once you’re done with the installation, you will be able to see your device in Android Virtual Device Manager as shown in the image below.

In the next step, we are going to set environmental variable. For that, press windows key and search “Edit environment variables” and open it.

Follow the below set of instructions to continue further: In the User variable section, click new as shown in the screenshot below.
After you’ve clicked New, a screen like the image shown below appears on your screen.
- Fill variable name as ‘ANDROID_HOME’ (Without single quote)
- For Variable value, open your C drive -> Users -> {Your_pc_name} -> AppData -> Local -> Android -> Sdk and copy that path.
- Variable value shall be - ‘C:\Users\HP\AppData\Local\Android\Sdk’ (Without Single quote)
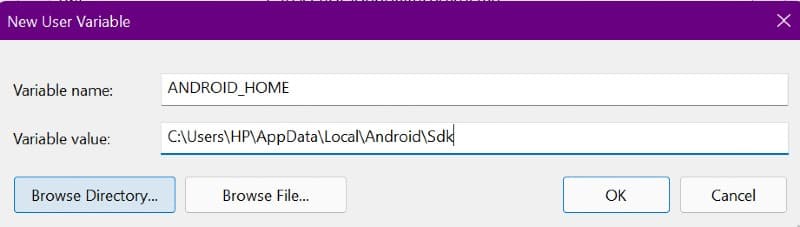
- After you click Ok, you shall be able to see your variable in the user variable section.

Step 5:
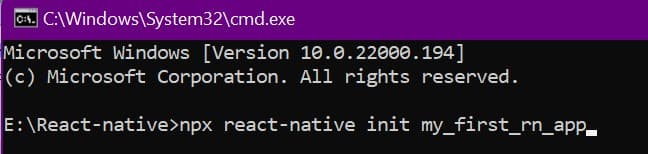
(a) Create new React Native Project
Follow the steps as mentioned below-
- Open terminal
- Change the directory/folder where you want to create your project.
- Run command : npx react-native init my_first_rn_app
Note: - my_first_rn_app is the project name. You can give any name.
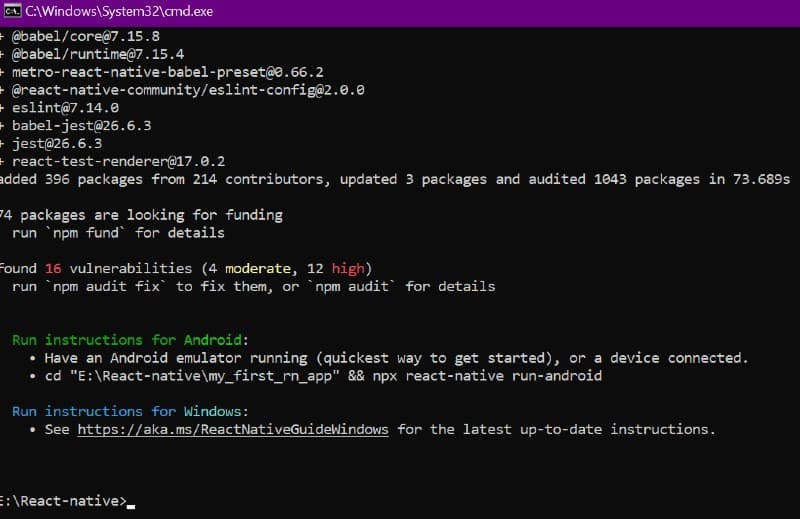
After installation, the new React Native project will look like the image shown below.
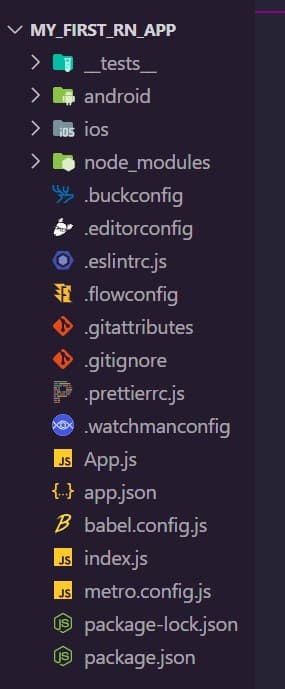
The Project structure will look like below image (Open project in VS code)
Step 6 :
(a) Start Emulator
Following steps must be followed for this process.
- Open Terminal at location : -
C:\Users\HP\AppData\Local\Android\Sdk\emulator

- Run Command : emulator -list-avds
It will show the list of devices (emulator)

- Copy emulator name.
- Run command: emulator -avd Pixel_3a_API_29 to start Emulator
Note : - Pixel_3a_API_29 is the emulator name
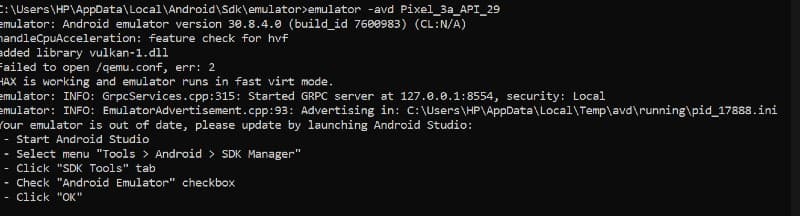
- Now our running emulator will look like the below image

Step 7:
After we’ve followed all the aforementioned steps, we’re almost ready to run our first app.
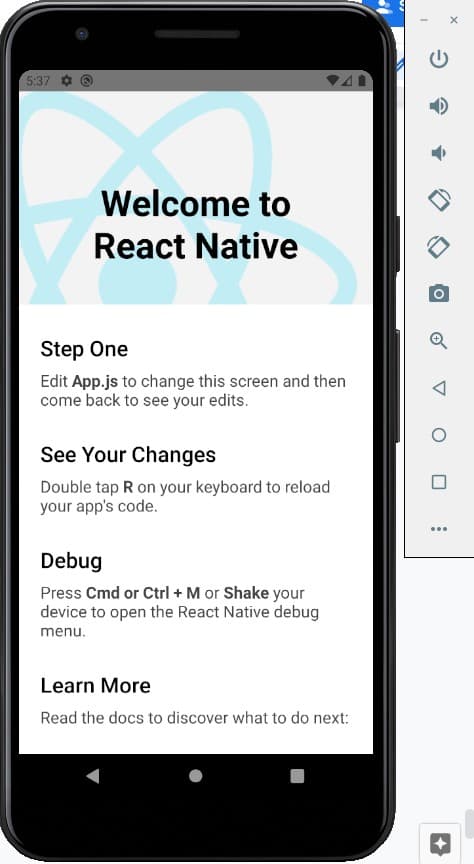
- Open terminal in vs code (after opening the project in vs code)
- Run command : npx react-native run-android

- It will start metro and emulator as well.
Note: - Do not close opened window by run-android command
- Emulator output looks like the below image
And we’ve finally completed the process of React Native setup in Windows using Android studio and Node. We have successfully created an up and running react native environment. We started with downloading jdk and setting environmental variable for it. We Installed Node js, react native CLI, android studio and android SDK; and finally set up the environmental variable for android sdk to create a fresh react native project.
Did you find our guide on "How to Set Up React Native in Windows using Android Studio and NodeJS" useful? Are you ready to develop your first React Native application? Now that you're all set up, your journey into the world of React Native has only just begun. Keep exploring, keep coding, and remember, we're here to help if you hit any roadblocks along the way. Have any questions or feedback? Let us know in the comments section below! Happy Coding!