
While building a student management system in a project where the tech stack includes NodeJS, Express JS & MongoDB, I had to create an API to make student data available for consumption by other enterprise applications as well as mobile apps. For this, I had to create the CRUD App API and test the same in Postman. In this blog post, I am sharing my learning in a step-by-step process.
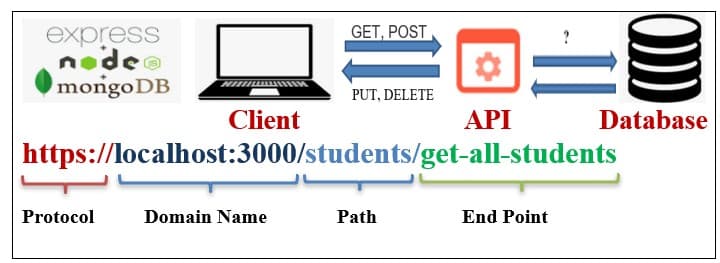
We combine CRUD APP API, ExpressJS, and MongoDB as a single architecture as shown below.
Prerequisites:
- If you know the basics of Javascript it will help you to understand functions.
- You need to have Node installed.
- MongoDB with MongoDB Compass installed.
Now we build the CRUD APP
How do we model our app? Here I am using a standard and best practice project structure to build CRUD App.
We start by separating out logical building blocks or folders like below:
- Config: This is used for changing ports, running projects, and other configurations.
- Routes: To create route files for the individual route (like user-route, student-route, admin-route, etc ) and map these to Controller.
- Controllers: Here we write logic (like user-control, student-control, etc).
- Model:Here we define our Schemas.
- Middlewares:Here we define some middleware like authentication check, security check, user check, etc.
- Test: This is used while testing our node application.
Let’s start creating Schema for our CRUD API
As I am creating a CRUD app for Students, I named the folder as Students-App. You may give any related name of your project as a standard naming convention.
![]()
Here we install the application generator tool which has preinstalled express, called express-generator, to quickly create an application skeleton. You can visit this Express application generator to know more about Express Generator.
Install express-generator using below cmd:
npx express-generator
After installing Express Generator, one must install necessary packages like,
- Install node_modules by the following command:
npm install - Install Nodemon the following command:
npm install nodemon --save-dev - Install mongoose
npm install mongoose
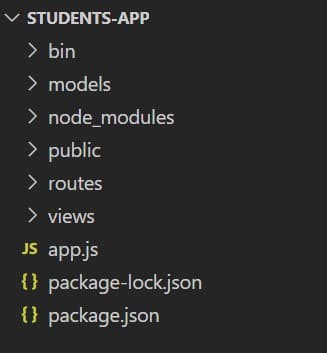
You can see the below code structure given by Express Generator.
Only the Models folder is newly created to write our models, while the others are created while installing Express Generator.
Running Node for the first time
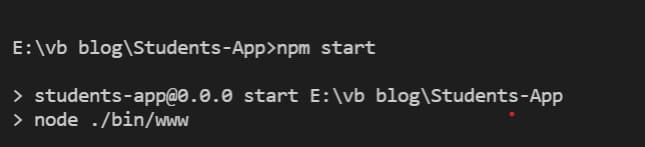
The easy way to use a node is to run the node command, and specify a location of a file. As we are using Express Generator, it provides a script key in the package.json file to run our Express.

We use the command npm start in Command Prompt and get the result as shown below-
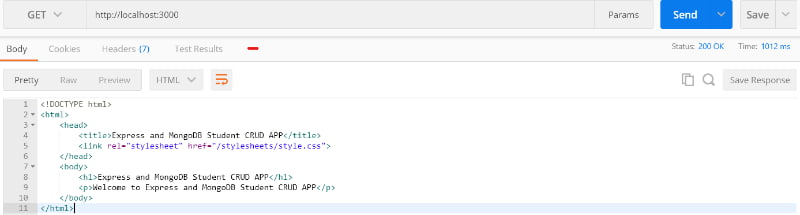
Now you can open any web browser and type URL localhost:3000. Once you hit Enter, you see the following result which I get from routes/index.js. It is created by Express Generator and contains the HTTP GET method with the title: ‘Express’ which I changed to ‘Express and MongoDB Student CRUD APP’ as shown below.
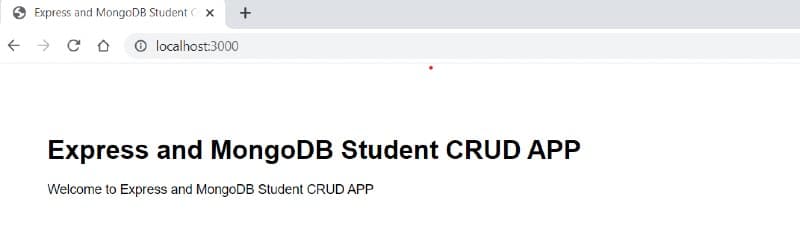
Awesome..!! We successfully run our App.
Let’s run using Nodemon. This will run the server automatically.
Note:
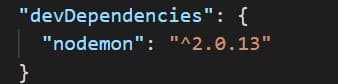
We use a --save-dev while installing nodemon because --save-dev adds nodemon in a devDependency in the package.json file as shown in the image below.
Now, you can use the nodemon start command to run the App.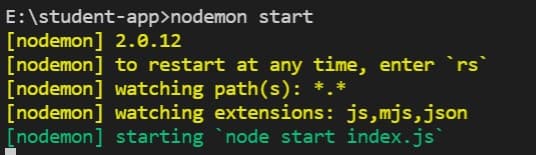
You can see in the terminal (command prompt) like above and you don’t need to stop the server, and restart. When changes in code occur it restarts automatically, and code is saved on the auto mode. You can check output in any browser by searching the url localhost:3000/.
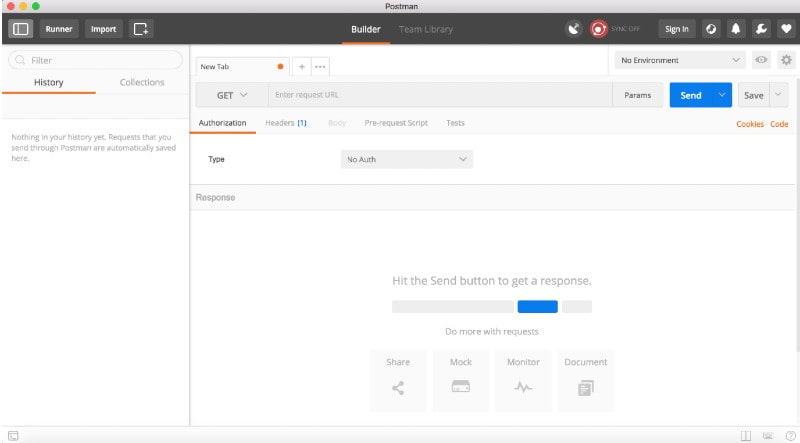
Let’s install the Postman App
Postman is a GUI that helps in the testing of our APIs which were developed by Express and view their responses in an organized way. Everything we perform in Postman can also be done through the command line, but Postman makes the process faster and easier by providing an interface and powerful set of tools.
Download/Installation
You can download Postman from Postman. Let’s open the POSTMAN App and enter the URL.
In our project, the starting URL will be => localhost:3000/. Don’t forget to run the project because to get data in POSTMAN you need to run the project using the command nodemon start.
After running the project, open the postman app
Follow the below steps:
- Enter the URL of your project i.e: localhost:3000/.
- The default HTTP method will be GET. You can select different methods by clicking on the GET list of the POSTMAN App.
- Let’s see the GET method, by using URL localhost:3000/ and click Send
Note:
- As We can see Status: 200 OK, which means the request has succeeded. I should say you need to have basic knowledge of the Status codes so you can visit this Status Code link and understand the codes.
I think now you are able to create an API and get in POSTMAN as we have created an API as localhost:3000/, the URL is based on app.js as we can see below / (forward slash) is passed for indexRouter.
app.use( '/', indexRouter);
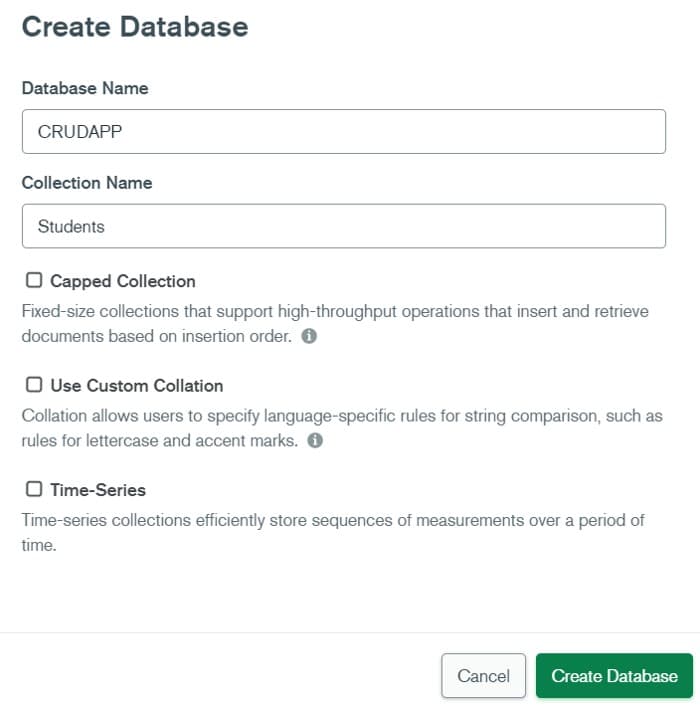
Creating Database using MongoDB
The image below is an image of Creating Database using MongoDB Compass which I downloaded while installing MongoDB. Here I am creating a Database named CRUDAPP for our Student management system.
Now you can use the connect database into app.js as shown below.
Let’s Create our models, open a folder named model in the Students-App folder and also have a new file named student.model.js. I am creating the CRUD API for Student-APP and writing the code for creating Schema with export. We can also use it in other files where we need that model, as shown below,
Note:
- mongoose.model(“collection_name”, SchemaName)
- Collection_name, nothing but table name to be saved for creating Student Schema in Database.
- In the screenshot shown above, I used Student as collection_name which will be created in database CRUDAPP in MongoDB by name “students”.
Now you can import the created model into app.js or any file by following the code shown below.
Great..! We created our first Schema.
Let’s start creating routes for Student-app. For this, we need to open folder routes and create a new file in the routes folder named student.route.js. Once this step is done, start writing the below code for HTTP methods.
Note:
- After creating the routes, it is mandatory to import or require in app.js as below,
As we can see above we are using StudentController for writing the logic of HTTP methods. For this, we need to create a new folder named controller and inside that folder create a new file named student.controller.js, which contains the code shown below.
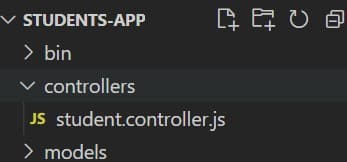
The student.controller.js contains below logic code to perform HTTP methods.
Testing APIs with POSTMAN
Once again run the server using, nodemon start command and open the POSTMAN App to test our APIs as below:
1. GET method:
Reading data or documents from MongoDB. We get documents when we run GET method in postman using GET URL - localhost:3000/students/get-all-students We get resultFound = 0 as student collection with no data or documents as shown below,

In the above image, we can find that Status: 200 OK means route successful but as in Body we can see that the resultFound=0, as no data is shown in the collection. In headers it will take Content-Type: application/json as our MongoDB deals with JSON data.
2. POST method:
Our next step requires adding documents to the MongoDB student collection.
Here we going to add one document to our student collection as in json format in Body as raw data using POST URL- localhost:3000/students/add-student as shown below.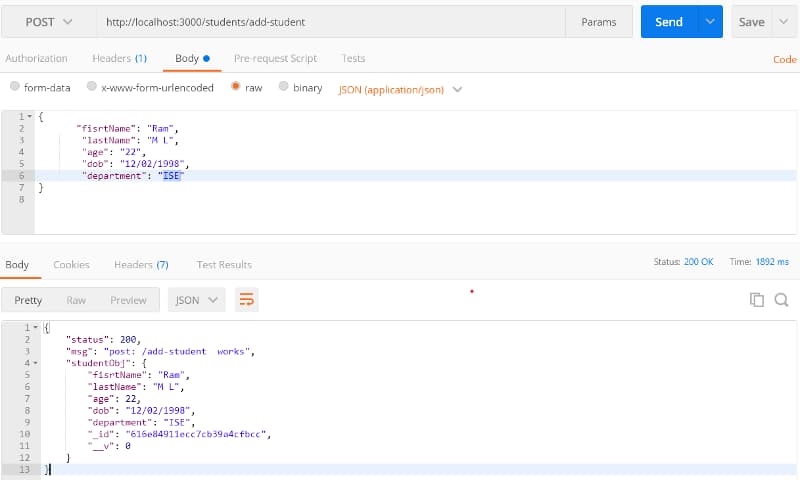
In the above image, we can see that the data in Body - raw is data to be stored in the student collection, and below is the result that data has been added successfully with Status: 200 OK.
If we run the GET URL once, we get the following result. As we can see now, resultFound is 1 as shown below
3. PUT method:
In our next step, we shall be updating documents in the MongoDB student collection.
Here we are going to update one document by ID in our student collection as json format in Body as raw data using PUT URL-localhost:3000/students/update-student? _id=616e84911ecc7cb39a4cfbcc And, as below using _id as in URL.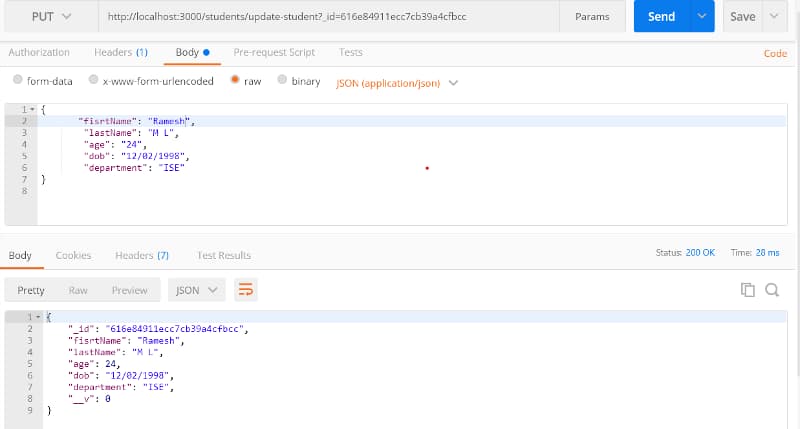
In the above image, we can see the firstName and age initially were Ram and 22, respectively. But in the GET and POST method, now I am updating it to Ramesh and 24, respectively. You can see the response in Body below Status: 200 OK. You can run the GET URL to see changes in the student collection.
4. DELETE method:
Deleting one document in MongoDB student collection using its ID.
Here you are going to delete one document by ID in our student collection using DELETE URL - localhost:3000/students/delete_student?_id=616e84911ecc7cb39a4cfbcc as shown below using ID in params.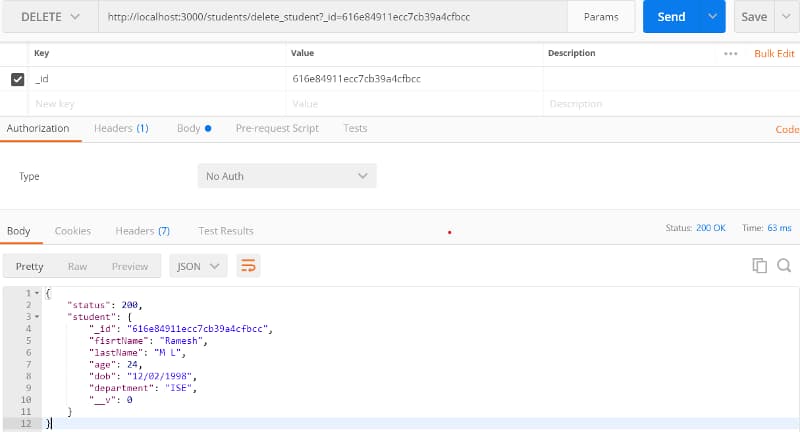
As you can see the result is that the data which is having _id=616e84911ecc7cb39a4cfbcc has been deleted. You can see it running the GET URL once again, which gives resultFound=0 as below.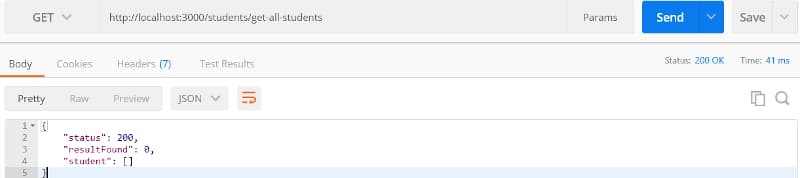
Given below are the POSTMAN App links:
- CREATE: POST method
localhost:3000/students/add-student
- READ: GET method
- GET all students list
localhost:3000/students/get-all-students - GET student by First Name localhost:3000/students/getStudentByFirstName?fisrtName=Harpreet
- GET all students list
- UPDATE: PUT method
localhost:3000/students/update-student?_id=616d87940152a10f30df9ce8
DELETE: DELETE method
localhost:3000/students/delete_student?_id=616e7216d0bf5739dda22b86
We learned a lot in this tutorial. Here’s a list of things we worked together:
Understood how to create, read, update and delete documents from MongoDB.
Created a Database in MongoDB.
Save, read, update, and delete from MongoDB.
Tested our CRUD APIs in the POSTMAN App.
You may now start trying to explore new things like using different data types while creating Schema, validation, and authenticating your routes using jwt, etc. Now you know about creating a simple CRUD API with Node, Express, and MongoDB. Here’s wishing you luck in order to start creating more applications.