
High availability and scalability are the two most desired traits of modern enterprise level applications. By implementing the following architecture for running Drupal instances with AWS EFS and RDS, we will be inherently benefited by AWS highly available infrastructure and on-demand scaling of the application resources.
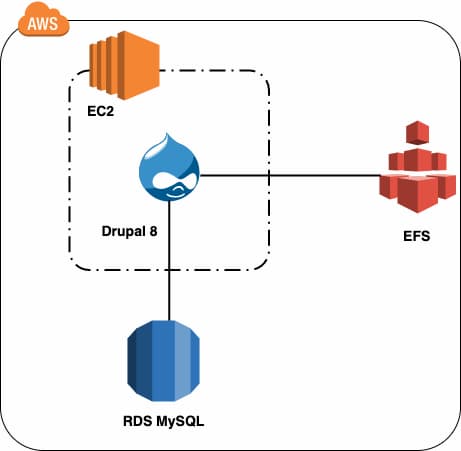
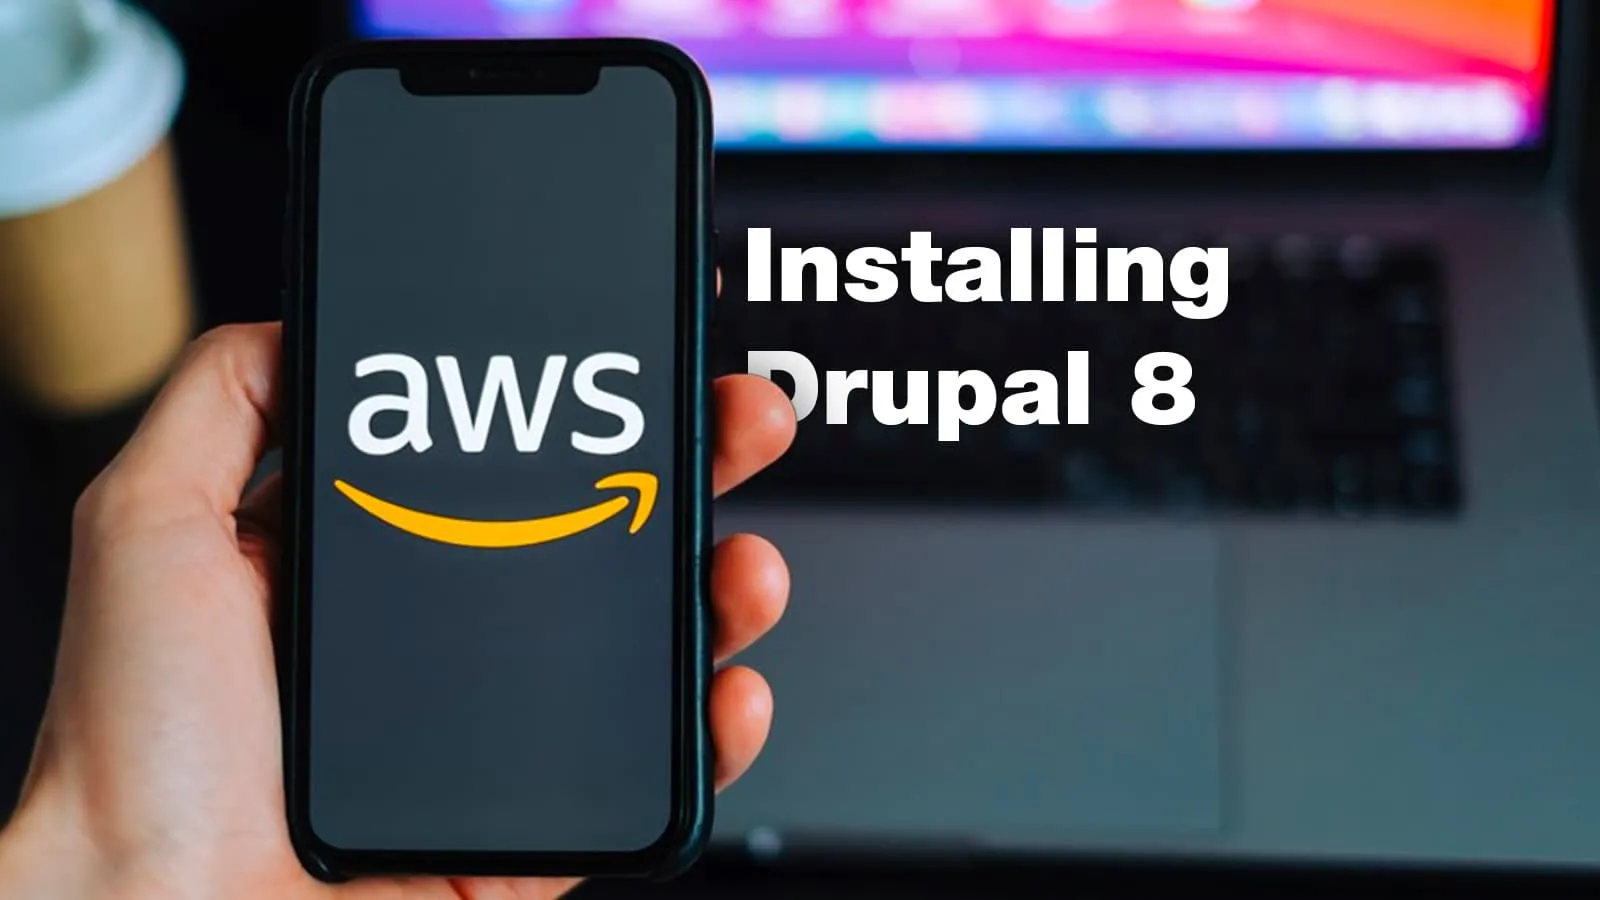
Drupal 8 is used to manage the creation and modification of digital content. It is considered as one of the world's favorite open source content management platforms. You can read about popular and well-established use cases by Drupal here - https://www.drupal.com/showcases
The recommended way to install Drupal 8 is using Composer. This blog post will guide you through the steps needed to install Drupal 8 on an AWS EC2 instance, using RDS MySQL database and EFS as the file system.
Prerequisites
- AWS account is required for the implementation part of this blog.
- Having basic knowledge working with AWS services would be really helpful.
What you will learn
- How to configure AWS EC2
- Install LAMP Stack on EC2
- Create and Configure AWS RDS MySQL
- Create and configure EFS
- Install and configure Drupal 8 using the recommended installation method
- Configuring each individual service to work together
Drupal 8 Requirements
- MySQL 5.6.34 or higher
- Apache 2.x
- PHP 7.4
For more detailed requirements please visit https://www.drupal.org/docs/8/system-requirements
Let’s take a look into configuration and installation of Drupal on AWS in this step by step guide -
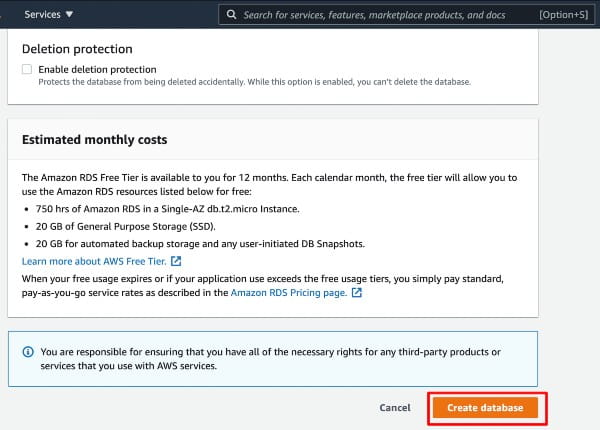
1. Creating The AWS RDS MySQL Database
- Search for RDS service in amazon console search bar

- Click on “Create Database” after going to the AWS RDS service page
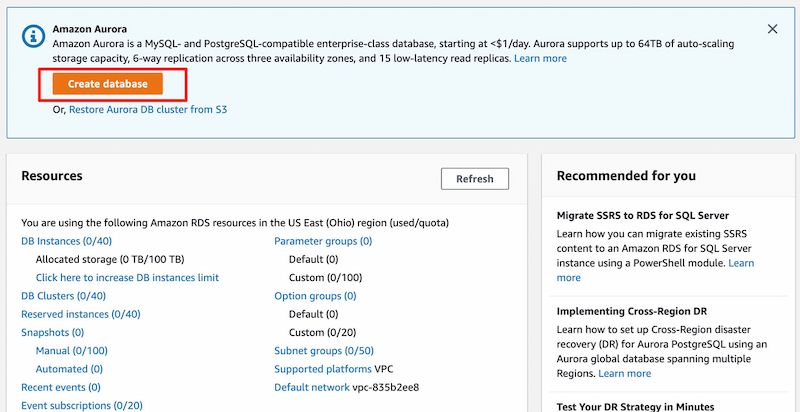
- Select the “Standard Create” option under the section “Choose a database creation method info.”
- Pick engine option as “MySQL” & select MySQL 5.6.34 or above for DB Engine version
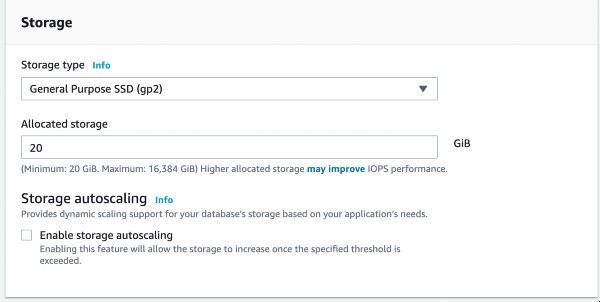
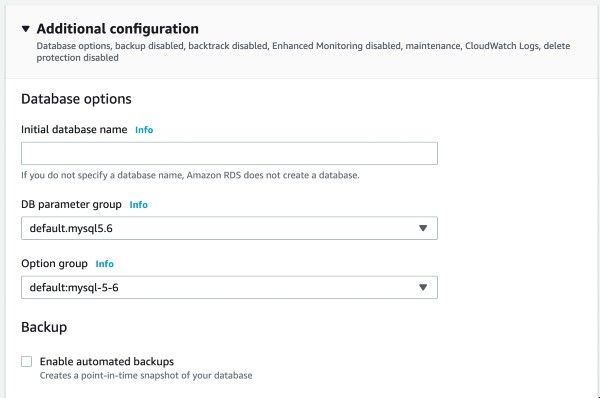
- If you want to keep things less expensive, make sure to go with below mentioned options:
- Templates → Free Tier
- Storage → Uncheck Enable storage autoscaling
- Additional configuration → Uncheck Enable automated backups
- Use string “drupalvb” as instance identifier value along with the username and password.
- Make sure to give “Public accessibility” as “Yes”. This enables our newly created EC2 instance to access the database from the same VPC or also from a different VPC.
- Rest of the settings remain as default, and you can now finish creating the database.
2. Creation of EFS
- Search for EFS in amazon console search bar
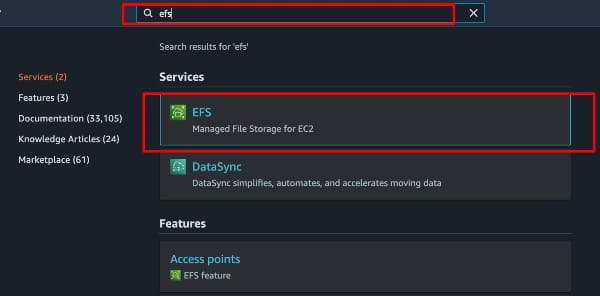
- Go to EFS service and click “Create file system”
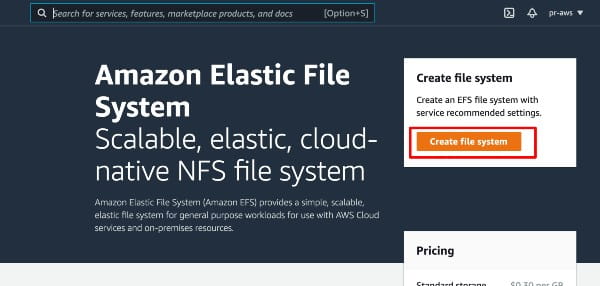
- After clicking on “Create file system“, a pop-up like below will appear
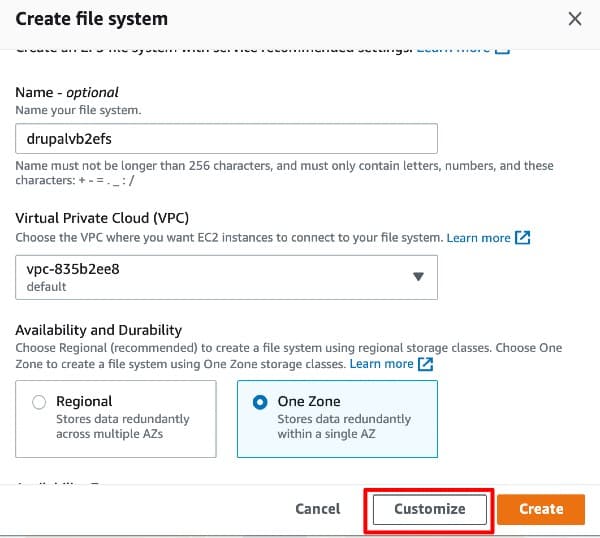
- Fill up the details in the fields referencing the above image; then click “Customize”
- In order to make it less expensive, we can opt for following options while customization:
- Uncheck “Enable automatic backups” under Automatic backups
- Set Transition into IA to “None” under Lifecycle management
- Uncheck “Enable encryption of data at rest” under Encryption
- Keep the rest of the settings as default and finish creating the EFS.
3. Creating the EC2 Instance
- Search for EC2 in amazon console search bar
- Select “Amazon Linux AMI 2” as displayed below
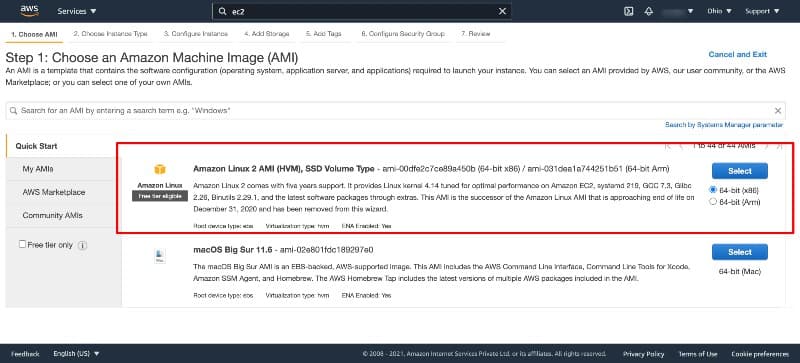
- To make it less expensive, you can opt for free tier eligible EC2 instance type t2.micro
- Name the Security group “drupalvb-sg” as shown in the picture below

- In configure Security Group Settings, add two rules to allow traffic over port 80 and 2049 as above. So we can access EC2 over the public internet and handle EFS.
- Keep the rest of the settings as default and launch the instance.
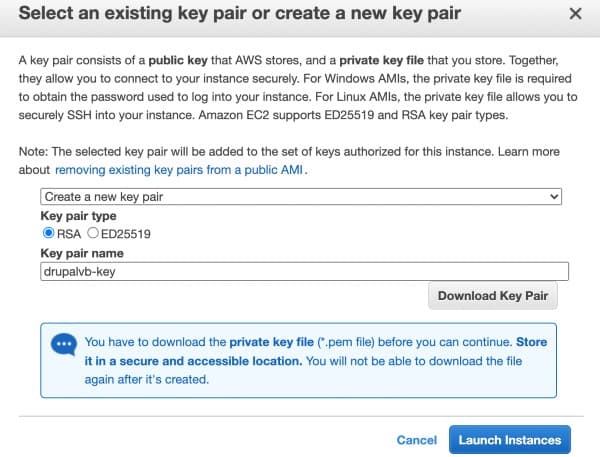
- You can create a new key pair and download the key or select an existing key.
4. Setting up Drupal 8 in EC2
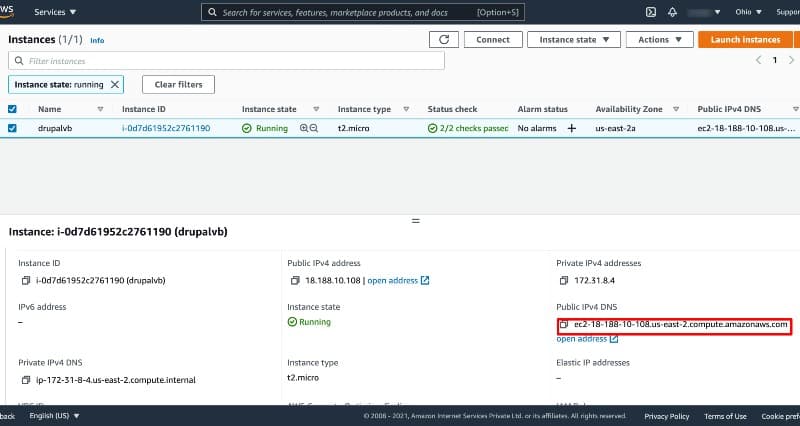
Using EC2 instance endpoint, SSH into the EC2 instance as shown in the image below -
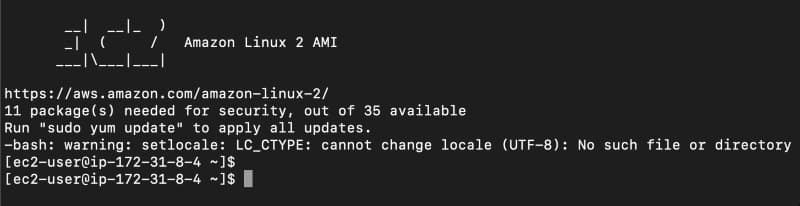
Once successful, it should look like below.
4.1. Mounting the EFS on EC2 instance
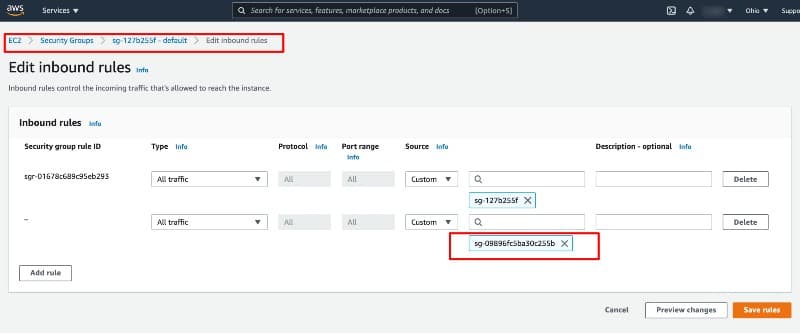
- Get the security group details of the EC2 instance which we created earlier.

- Attach this EC2 Security Group to EFS under Network access as below -
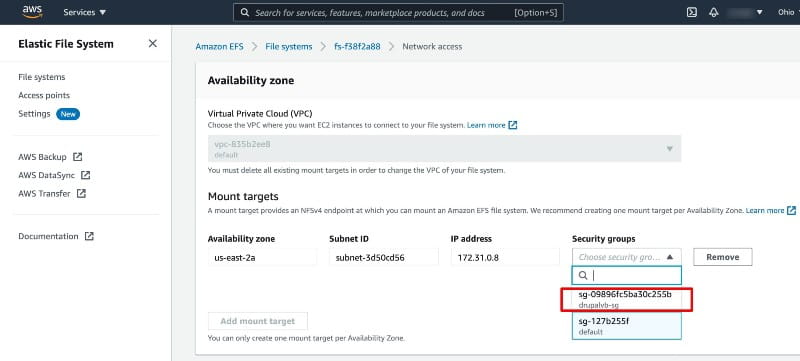
- Adding this EC2 security group will give us permission to mount EFS to our EC2 instance.
-
Complete the mounting operation of EFS drive with following commands -
-
sudo mkdir -p /dev/mnt/efs
sudo mount -t nfs4 -o nfsvers=4.1,rsize=1048576,wsize=1048576,hard,timeo=600,retrans=2,noresvport 172.31.0.8:/ /dev/mnt/efs
[Replace “172.31.0.8:/” with IP address of your EFS drive]
[“/dev/mnt/efs” Here you will be using the location wherever you want your EFS drive to be mounted]sudo chmod 777 -R /dev/mnt/efs/
-
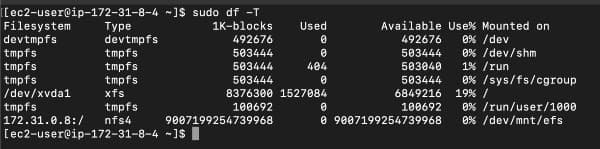
Mounted EFS file system details can be seen with following command -
sudo df -T
4.2. Installing required packages
- PHP 7.4 (Recommended for Drupal 8)
- Apache 2.4 (Required for Drupal 8)
- MySQL (To verify DB Access)
- Git (Required by Composer to install and update drupal project)
Use the following set of commands to install all of the above:
sudo amazon-linux-extras enable php7.4
sudo yum clean metadata
sudo yum install php
php-{pear,cgi,common,curl,mbstring,gd,mysqlnd,gettext,bcmath,json,xml,fpm,intl,zip,imap} mysql git
sudo systemctl is-enabled httpd
sudo systemctl enable httpd
sudo systemctl is-enabled httpd
sudo systemctl start httpd
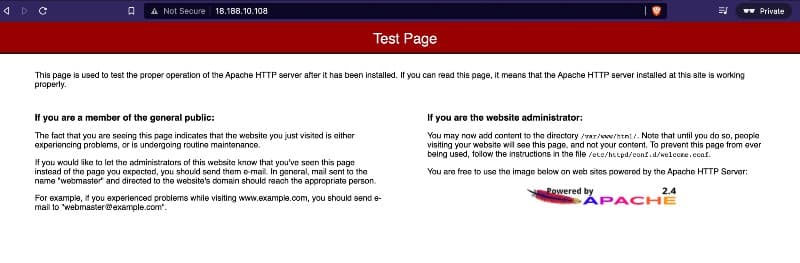
After running above commands, while accessing your server in web-browser with your EC2 Instance, public IP address will display following webpage -
4.3. Installing PHP Composer
Run the following commands. For more information or help go to this link.
php -r “copy(‘https://getcomposer.org/installer', ‘composer-setup.php’);”
php composer-setup.php
php -r “unlink(‘composer-setup.php’);”
sudo mv composer.phar /usr/local/bin/composer
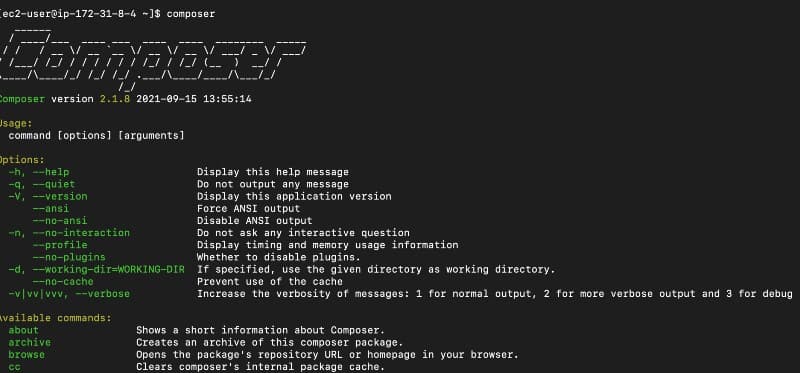
If everything goes as per the guide, and is successful, the command composer should show us the composer help.
4.4. Installing Drupal 8
We should install Drupal 8 inside a previously mounted EFS drive. Run below command to change into the directory
cd /dev/mnt/efs/
For installing Drupal 8 inside directory “drupalvb” under “/dev/mnt/efs” via composer run following command:
sudo /usr/local/bin/composer create-project drupal-composer/drupal-project:8.x-dev drupalvb --no-interaction

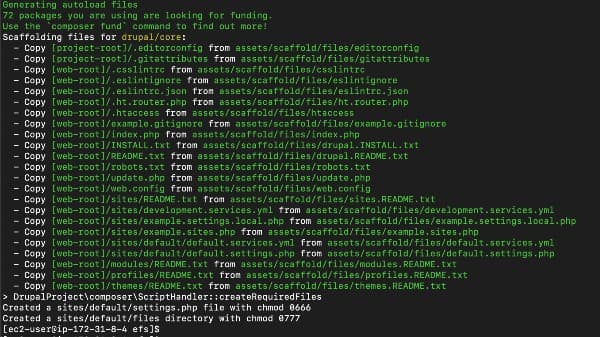
If the process is completed without any interruption, you will see the screen as displayed above in the images, and a new directory with the name “drupalvb” will be created as we have passed this name while using composer to install drupal 8
To provide read, write and execute permission to the downloaded “drupalvb” directory, run the following command:
sudo chmod 777 -R drupalvb
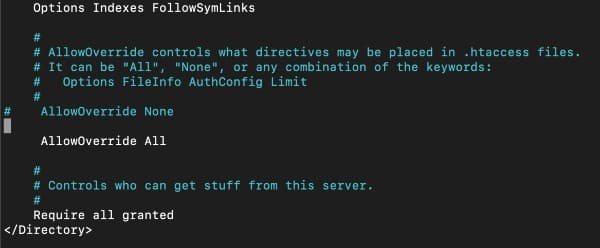
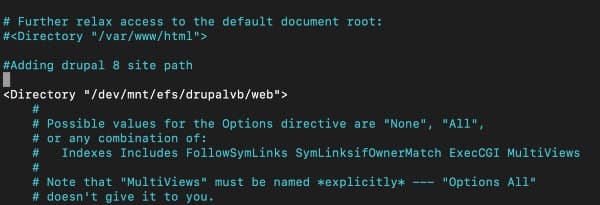
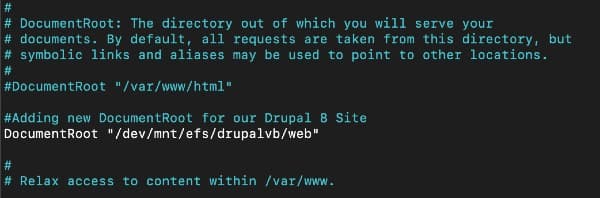
There’s a requirement for Apache “rewrite url” to be enabled for Drupal 8, and the Document Root directory also needs to be changed.
To complete this step, open “httpd.conf” file using following command and follow further instructions :
sudo nano /etc/httpd/conf/httpd.conf
Change AllowOverride “None” to AllowOverride “All ” in block “<Directory “/var/www/html”>”
Change \\<Directory “var/www/html”>\\ to \\<Directory “/dev/mnt/efs/drupalvb/web”>\\
Change \\DocumentRoot “/var/www/html”\\ to \\DocumentRoot “/dev/mnt/efs/drupalvb/web”\\
5. Allow access to EC2 instance for RDS MySQL database
- Copy the ‘Group ID’ from EC2 instance security group as displayed below
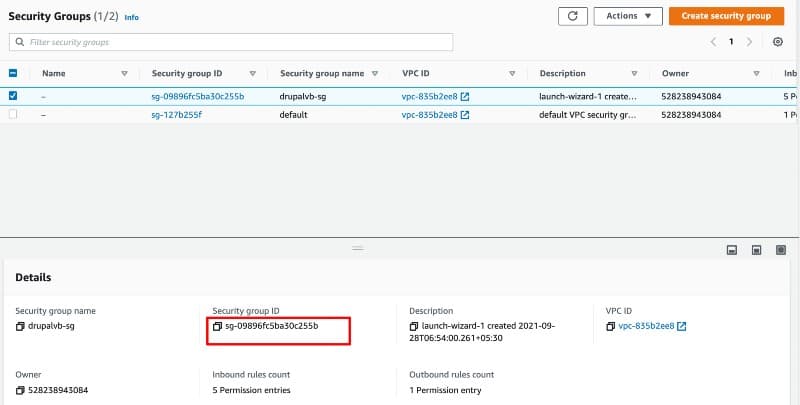
- Go to the AWS RDS MySQL Security group and add the following rule to allow “All Traffic” from EC2 security. Make sure that the ‘Group ID’ is copied, and pasted as shown in the image below. After this step, click ‘Save’.
-
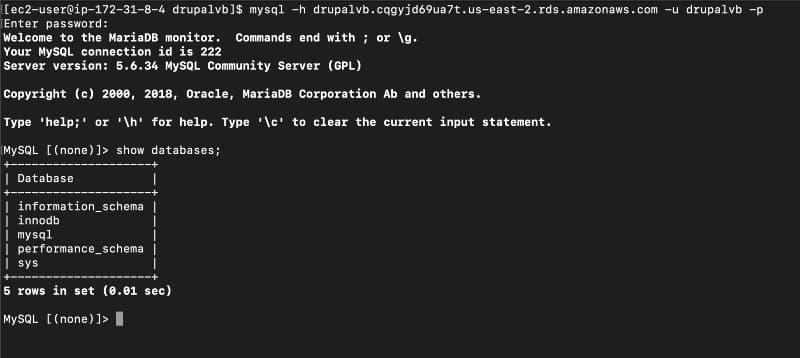
To verify EC2 instances have access to the MySQL database, execute the following command in the SSH command shell.
mysql -h
-u -p -
A prompt to enter the password will come up. After entering the password, you should be able to query databases as follows.
show databases;
6. Launching the Drupal 8 install wizard
Now that most of the components are properly setup, we can continue to access our Drupal 8 endpoint which will automatically trigger the installation wizard.
- Get the public IP address of your instance and open it into a browser in a new window to initiate the process further.

- Choose language and click “Save and continue”
- Select “Standard” from Installation profile, and click on “Save and Continue.”
- In Database configuration select, “MySQL,MariaDB, Percona Server, or equivalent”
- For the reference purpose, have a look at the below image -
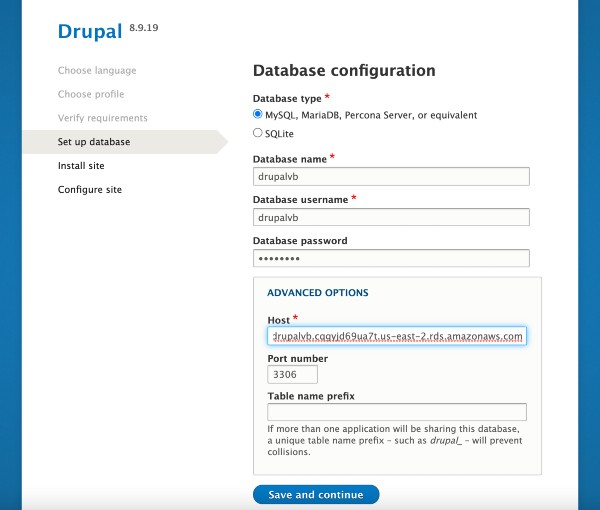
- After filling up the required details click “Save and continue”
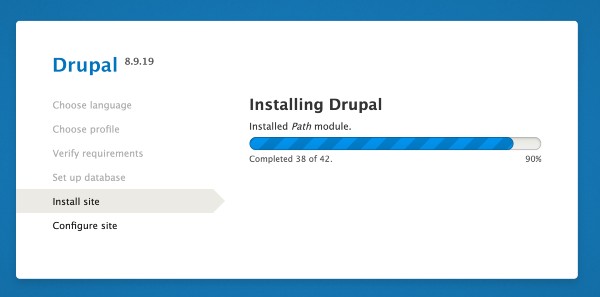
- Following the process, you should be able to see this progress bar on next step completed.
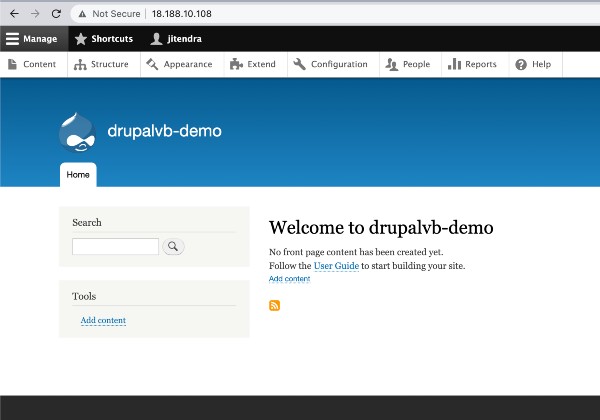
- Finally you have your Drupal Site up and running on AWS infrastructure with RDS and EFS.
We have completed the step by step process of installing Drupal 8 on AWS cloud.