LEMP Installation (Nginx, MariaDB, PHP And phpMyAdmin) on Ubuntu 14.04 in 4 steps

A combination of Linux based operating system and open-source software stack, LEMP provides a LAMP compatible platform for all applications. The acronym LEMP stands for Linux, Nginx (engine-x) HTTP Server, MySQL/MariaDB database and PHP/Perl/Python. A key distinguishing factor between LEMP and its predecessor LAMP is the replacement of the Apache Server with nginx ( pronounced “engine x”) in LEMP , which has made the server more scalable in response to high demand situations. Meanwhile you have an option to replace MySQL with MariaDB, a more scalable and robust SQL server with multiple enhancements.

Here's a look at how I configured a LEMP server on Ubuntu 14.04.

Step 1: Install Nginx

Install nginx using command :

sudo apt-get install nginx

Start Nginx service using the command:

sudo service nginx start

Open up web browser and navigate to http://ip-address/ or http://localhost/. See a screen with message Welcome to Nginx!

# Nginx Configuration:

Open the file /etc/nginx/nginx.conf  and enter the following command in terminal

sudo nano /etc/nginx/nginx.conf

Set the worker_processes To see the no. of CPU’s, use the command “lscpu”. In my case it’s “4″. So I set this as ’4′.

worker_processes 4;

After that Restart the Nginx Services :

sudo service nginx restart

The default vhost (server block) is defined in the /etc/nginx/sites-available/default file.

Under the Server section, as shown below add index.php line.

server {
      listen 80 default_server;
      listen [::]:80 default_server ipv6only=on;
      root /usr/share/nginx/html;
      index index.php index.html index.htm;
      # Make site accessible from http://localhost/
      server_name server.unixmen.local
}

Under the section #location ~ \.php$. Uncomment and modify the following lines as shown below.

location ~ \.php$ {
         try_files $uri =404;   ---------> Add this line
         fastcgi_split_path_info ^(.+\.php)(/.+)$;
         #       # NOTE: You should have "cgi.fix_pathinfo = 0;" in php.ini
         #
         #       # With php5-cgi alone:
         #         fastcgi_pass 127.0.0.1:9000;
         #       # With php5-fpm:
         fastcgi_pass unix:/var/run/php5-fpm.sock;
         fastcgi_index index.php;
         include fastcgi.conf;
    }

Added an extra line ‘try_files $uri =404;’ to prevent zero day exploits.

# Test Nginx configuration

Test the nginx configuration for any syntax errors using command:

sudo nginx -t

Sample output:

nginx: the configuration file /etc/nginx/nginx.conf syntax is ok
nginx: configuration file /etc/nginx/nginx.conf test is successful

Finally restart nginx service

sudo service nginx restart

Step 2 : Install MariaDB!

A drop in replacement for MySQL and a reliable SQL server, MariaDB comes with a rich set of enhancements that makes it more robust and scalable.

# For Installing MariaDB enter this command in the terminal.

sudo apt-get install mariadb-server mariadb-client

During installation set database ‘root’ user password set password.

# Check the MariaDB version using command:

sudo mysql -v -u root -p

# Check if MariaDB is running or not, using the following command:

sudo service mysql status

Step : 3 Install PHP

PHP (recursive acronym for PHP: Hypertext Pre-processor) is a widely used open-source general purpose scripting language that is especially suited for web development and can be embedded into HTML.

# Install php5-fpm

sudo apt-get install php5 php5-fpm php5-mysql

# Configure PHP

Open php.ini file in any editor:

sudo nano /etc/php5/fpm/php.ini

Find the line ‘cgi.fix_pathinfo=1′, uncomment it and change the value 1 to 0.

cgi.fix_pathinfo=0

Now restart php-fpm service.

sudo service php5-fpm restart

# Test if PHP is running or not.

Create a sample “info.php” file in nginx document root folder.

sudo nano /usr/share/nginx/html/info.php

Add the following lines in it.

Save and exit the file.

PHP-FPM listens on the socket /var/run/php5-fpm.sock by default. To make PHP-FPM use a TCP connection, open the file /etc/php5/fpm/pool.d/www.conf,


sudo nano /etc/php5/fpm/pool.d/www.conf

Find the line listen = /var/run/php5-fpm.sock,

;listen = /var/run/php5-fpm.sock

and modify it to listen = 127.0.0.1:9000.

listen = 127.0.0.1:9000

Save and exit the file. Restart php5-fpm service.

sudo service php5-fpm restart

Now open the nginx configuration file:

sudo nano /etc/nginx/sites-available/default

Find the line fastcgi_pass unix:/var/run/php5-fpm.sock; and change it to fastcgi_pass 127.0.0.1:9000; as shown below.

location ~ \.php$ {
        try_files $uri =404;
        fastcgi_split_path_info ^(.+\.php)(/.+)$;fastcgi_pass 127.0.0.1:9000;
        #         # NOTE: You should have "cgi.fix_pathinfo = 0;" in php.ini
        #
        #         # With php5-cgi alone:
        fastcgi_pass 127.0.0.1:9000;
        #     # With php5-fpm:
        #         fastcgi_pass unix:/var/run/php5-fpm.sock;
        fastcgi_index index.php;
        include fastcgi.conf;
   }

Save and exit the file.Now Restart nginx service.

sudo service nginx restart

# Manage Databases Using phpMyAdmin 

phpMyAdmin is a free open-source web interface tool used to manage your databases.

Step 4 : Install phpMyAdmin

Install it with command:

sudo apt-get install phpmyadmin

The phpMyAdmin installation has been completed.

Create a symbolic link between phpMyAdmin and the website root directory. Here our website root document directory is /usr/share/nginx/html/.

sudo ln -s /usr/share/phpmyadmin/ /usr/share/nginx/html

Restart nginx server again

sudo service nginx restart

Now manage your databases from phpMyAdmin web interface.

That’s it. LEMP server is now up and ready to use.

We at Valuebound are committed to furthering your business initiatives with our Enterprise level web solutions. For further information on our service offerings, please Contact us.

Five Takeaways from Drupalgeddon (SA-CORE-2014-005 SQL injection)

The Drupal based websites were supposed to be patched within seven hours of the critical security update release on October 15, 2014. The security release carried a clear warning about the security vulnerability (SA-CORE-2014-005 SQL injection), which was exploited by the hackers to write web bots that traced vulnerable sites on the web in no time.The Drupal 7 and Drupal core 8.0.x websites were found to be particularly vulnerable to the SQL injection while Drupal core 6.x websites were relatively safer if not running on the same server that hosted Drupal 7 sites. Here are a few precautionary and remediative measures that you must know as a Drupal site administrator.

# Patch your Installation on time: Take critical security releases seriously

As the popular adage goes a stitch in time indeed saves a lot more than nine. So the best strategy to ward off malicious attacks is to take the impending vulnerabilities into account and implement the solutions available.

Although two highly critical advisories were issued by the Drupal Security team in October this year, it failed to create enough hype about the impending doom. As a result the security of around 900,000 websites was compromised as they became targets of sweeping automated attacks. It affected all the Drupal core 7.x versions as many Drupal 7 websites chose to ignore or were too late to apply the patch release along with the Drupal 7.32 version update.

# Keep Track of your Vulnerabilities : Check for Backdoors

Sometimes there are multiple long standing issues that eventually lead to sites being hacked. But that is not the end of the road as the real challenge lies in resolving the issues by finding out the loopholes that led that security bug in. A vulnerability in the database abstraction API of Drupal 7 allowed attackers to generate requests that led to privilege escalation and arbitrary SQL execution. In short the hackers created backdoors(menu_router entry) to run a PHP code on your site which let them upload any content on it. Once the exploit files are installed to the server, the hacker can send http requests to execute PHP.

# If Hacked: Build a new server/rebuild an existing one

The choice between keeping a site or trashing it, after an attack should be made after considering the kind of efforts you would have to put in to restore it with a backup for all your files. You can replace the site with a static HTML file and take the site offline if it is being used to perpetuate malware. All the active sessions on the site should be put to an end and passwords must be replaced as a precautionary measure if you decide to keep the website. Keep track of the logins from external IP addresses by analysing the sessions table to identify fraudulent users. It will be a fairly easier task to rebuild a site with the help of an older database and file backup. You can check the integrity of your files using the Git status and scan the private file locations for *.php, *.sh or any other dubious files.

# Review the Damage : Follow the Breadcrumbs

While you can begin with examining the exploit files left on the server, a great option to conduct the post-mortem is to reverse engineer the tools that were employed to create these exploit files. Document all your exploited vulnerabilities along with solutions to fix the issues. Make an inventory of useful ideas to counter different vulnerabilities by assessing the damage done.

# Stay Safe: Continue following good security practices

An easy way to keep non-administrators off your site is to use an IP access control list in the Drupal .htaccess file. So the next time someone tries to post unauthorized content on your site, the result will be an error 404. The initial wave of attacks during Drupalgeddon were characterized by unauthorized content upload which could have been prevented if proper Unix File Permissions were set in advance. You must get accustomed to creating regular back-ups for both the database and the files on your web server.

Follow the Drupal community at Drupal.org to keep a tab on the latest developments and get into the habit of evaluating your website, especially in event of security releases and version updates.It is a good practice to notify fellow users about any security breaches on your site through the hosting company,as it may have implications for other websites hosted on the same server.Although every software is prone to vulnerabilities more often than not, the risk of future attacks can be minimized by making the platform write protected.

We at Valuebound understand your unique business needs while we strive to provide you with secure Drupal based Enterprise level Web Solutions. For information on our service offerings, please Contact Us.

5 Strategies to fine-tune Your Ongoing Support for Web Properties

Ongoing Support in any sector has a special appeal for the customer as it centers around a promise that the company will “have your back” in case something misfires.Although the introduction of Content Management Systems like Drupal has made it fairly easier for companies to take care of their web properties on their own, there may be technical issues that may need attention from the developer's end after the completion of a project. A support strategy is a key selling point that attracts and retains customers in the long run.You can formulate a few strategies of your own or follow the ones listed below to ensure smooth ongoing support, post completion.

# Start with Email Support

Email support is a fairly cost-effective and an interactive way to keep communicating with a client after the completion of a project. It helps you keep track of the support requests and monitor the time spent in attending to them. It also facilitates better support management as you can file in the “closed requests” separately to distinguish between the resolved and the pending support issues. Template responses for recurring issues will be an effective way to counter them provided the responses are kept updated.

# Introduce a cost-effective ticketing system

A ticketing system can be quite effective when combined with all the other forms of ongoing support like phone and email support. A ticketing system helps you monitor your support staff as well, particularly when there are multiple support staff involved in troubleshooting a case. A ticketing system helps you keep track of the support requests simultaneously based on the man-hours spent on resolving the issues.

# Offer real time support to resolve issues

The introduction of a chat option on your website is one of the quickest ways to resolve issues for your client, post-development. The support staff can get in touch with the client in real time to resolve issues or attend to the needs for improvisation. Although the code-related queries may require more time to be resolved, a client can be guided through a confusing process through real time interaction. Meanwhile queries that require detailed attention can be resolved through a ticketing system.

# Include diagnostic information in your documentation

The documentation for a web development project is equally crucial for a client as it is for the developers. The fact that you have put efforts to build in diagnostic information regarding the website and the related web properties like the mobile app will save you time that would be wasted troubleshooting minor issues. An FAQ model for the common queries along with the information will be more engaging and user-friendly for your client.

# Social media : a more responsive mode of support

Social media platforms like Twitter and Facebook have turned out to be a helpful addition to an ongoing support infrastructure. A facebook page dedicated to client support will not only engage your long standing customers but will also help you generate a fan base by resolving some general issues for a broader audience. Likewise tweeting links of online content that resolves a support issue will keep your customers in the loop about the probable issues and solutions as well.

Although ongoing support is a good strategy to help retain customers in the long run, it can be a big drain on your resources if left unregulated. It is important that the levels of support be discussed in detail to clearly distinguish between post-development free support and paid ongoing support in man-hours. A cleverly designed ongoing support strategy is a win-win for both the customer and the web solutions provider as it is a time-saver for both. We at Valuebound understand your unique business needs to provide enterprise level web solutions for the same. For more information on our support service offerings, please Contact Us.

Display node count by content type using Drupal views in 5 steps

In previous post we have used Drupal views to create block displaying node count values for taxonomy terms. Now I am going to show how we can configure similar block to count number of nodes by content type.

  1. Add  “Content: Type (type) under Fields Section.
    Add Content: Type (type) under Fields Section
  2. Configure field: Content: Type.

Configure field: Content: Type
 

  1. Under Contextual Filter add context “Content: Type”
    Under Contextual Filter add context “Content: Type”
     
  2. Configure contextual filter: Content: Type.
    By Selecting Display a Summary  under “When the filter value is NOT available”. By default option was checked for “Display record count with link” & Apply changes.
    Configure contextual filter: Content: Type

    Now the preview should have started showing up.
    Preview node count
     
  3. Saved Configuration to Apply Changes. You are done!

    Now just assign view block to specific region. 

How to display the node count values for taxonomy terms using Views

In this post I am sharing, how to display node count values for taxonomy terms using views. We have implemented this to quite a few blog site where we had to show number of blogs published in specific categories. In this example I have created one content type "story-Book" & taxonomy as "Book-tag"

Step 1:  Add  the field “Content: Book-tag” available in my “story-Book” Content type.

Adding a Tag Field “Content: Book-tag” available in my “story-Book” Content type

Step 2:  Add another field "Nid"

Add another field nid

Step 3:  Make sure we are counting only published content type, select “Content: Published“ as Yes in Filter Criteria

Select content published under filter criteria

Step 4: Under Filter Criteria add “Content: Type“ as  “story-book” of which we want to count the number

Under Filter Criteria add “Content: Type“ as “story-book” of which we want to count the number

Step 5:  Under relationships, add taxonomy terms: content with term

Under relationships, add taxonomy terms: content with term

Step 6:  Under contextual filter, add taxonomy term: name, choose "Display a summary", "Display record count with link"

Under contextual filter, add taxonomy term: name, choose
Display record count with link
 

We are done. Check the updated review to view terms with node count. Do not forget to save the view 

Node count preview
 

Step 7: Now just assigned the view block to region you want to display. I have assigned the block to left sidebar.

Node count achieved using views

This is one of the way we can do this. There are few more options in views which can be used to achieve similar result. Will explore more in next post. Do contact us if you would like us to help you on your next Drupal project.

EngineersGarage selects Valuebound to improve performance of Drupal 6 website & migration to Drupal 7

EngineersGarage has chosen Valuebound for support & maintenance services as well as to improve the performance of its Drupal 6 website. We will be working towards improving the site performance during peak traffic hours. Our initiatives are specifically meant to troubleshoot the issues faced by the website due to server overload because of frequent DDoS attack. We will also migrate the site to n-tier hosting architecture where web server and database will be deployed on separate locations. We will also be working on migrating the site to Drupal 7. Drupal 7 will help the website leverage new features with reduced number of modules and better performance to handle a web-traffic of 1.5 million page view per month.

About Engineers Garage

Engineers Garage is an innovative company which started its operations in 2010 with a mission to empower people with the technical know-how with its DIY projects and services.The company believes in constant ideation and the application of creativity to overcome technical hurdles as reflected in their products and services.

About Valuebound

Valuebound prides itself in being a boutique web services provider that keeps evolving with each project it undertakes. Valuebound is a key contributor to the Drupal community with a strong belief in having fruitful partnerships with our esteemed clients. We at Valuebound are committed to your business initiatives with our Enterprise level Web Solutions. Please contact us to know more about our service offerings.

Drupal 8 : Reasons why CMI has answers to all your Configuration Woes

The Configuration Management Initiative (CMI) has turned out to be quite a game changer for how the configuration settings will be managed and staged between different environments in Drupal 8. A Configuration Management System facilitates an ease of movement between the development, staging and production environments within a Drupal installation while minimizing the need to add extra modules.

In short the Configuration Management Initiative in Drupal 8 is set to solve some long-standing issues a Drupal 7 developer has been grappling with.

# A Unified Approach towards Configuration - Storage of Configuration as Files

An irksome issue with Drupal 7 is the different sets of standards followed by the modules in storing configuration. This often results in the configuration being scattered among database tables, variables and objects exported via CTools and Features, making it hard to detect where the relevant configuration is stored.The Configuration Management Initiative in Drupal 8 has taken care of all the hitches relating to the storage of configuration. The configuration will be stored in the form of human readable text files in the YAML (.yml) format.

# Improved Configuration Staging Capabilities

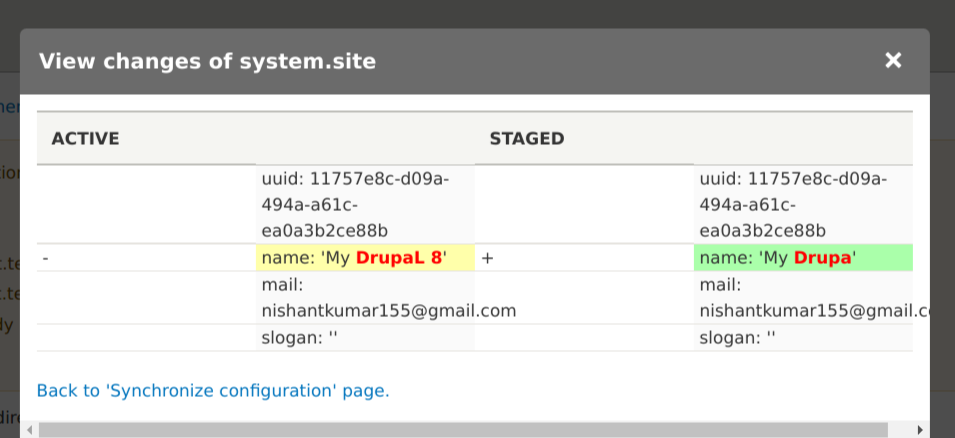
The Drupal 7 version relied on the Features module and the Features revert operation to have “staged Configuration”. The “import configuration” option available in Drupal 8 will let you import a single configuration file or even the entire site configuration with effortless ease. Although Drupal 7 offers better packaging capabilities, Drupal 8 outscores it with its “importing configuration option” which again is totally unfeasible with Drupal 7 features.

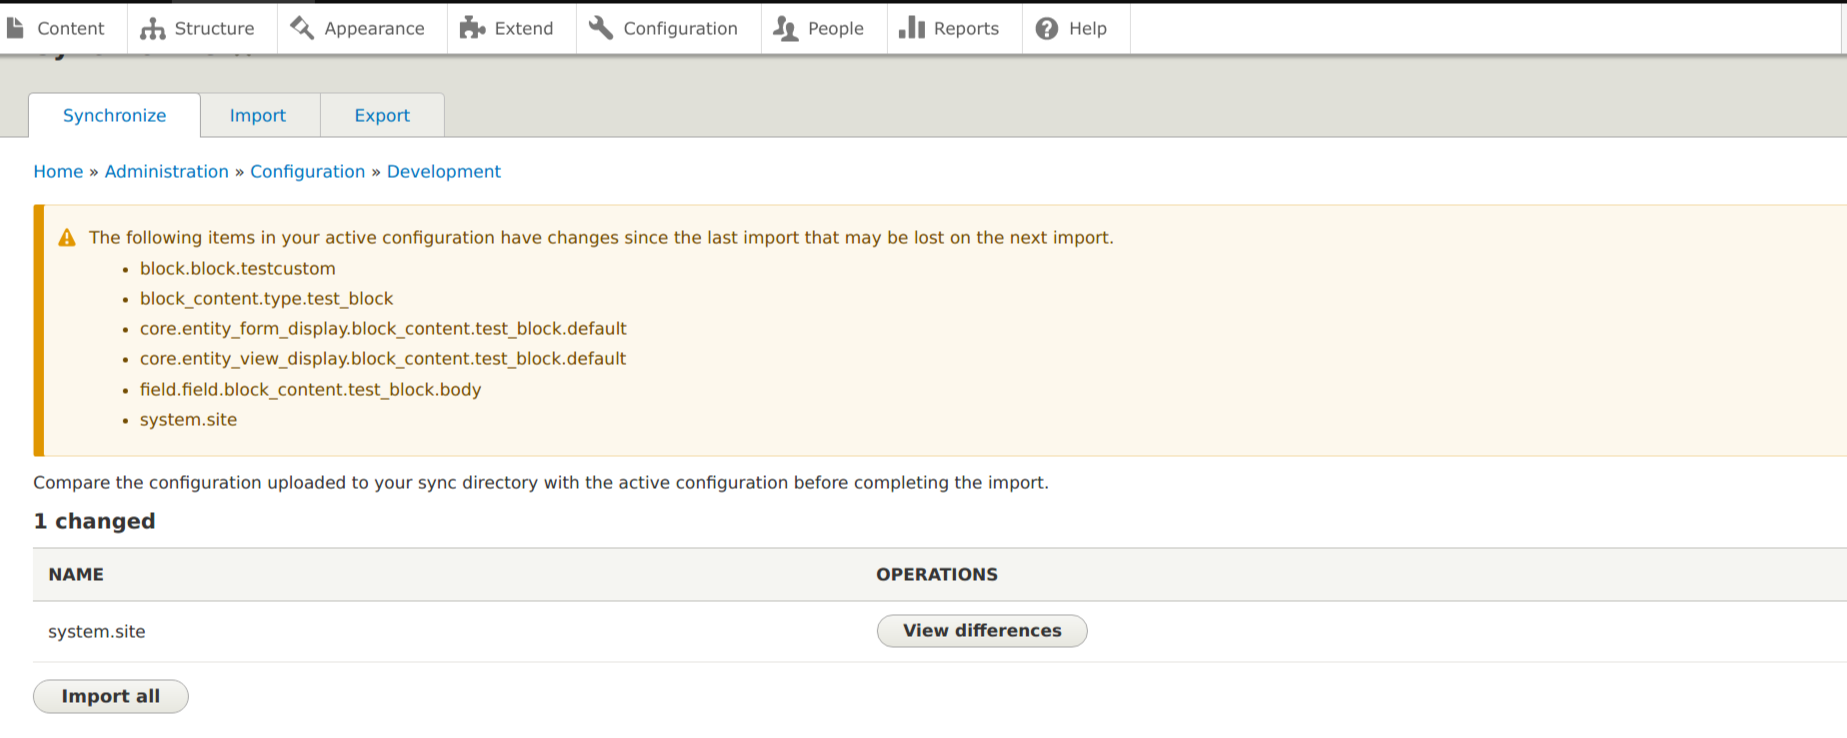
A version control system in Drupal 8 lets you keep track of your configuration changes.The import, export and synchronization of configuration on a site can be done via Manage > Configuration > Development > Configuration management (admin/config/development/configuration).

# Where are the Configurations Stored?

The new configuration system uses two directories to store configuration, the active and the staging directories. When settings are modified by a site administrator, the changes are stored in the active configuration in the database and can be exported back to the files when needed. When a module is enabled, the default settings are copied to the active configuration in the database. The default settings of Modules are stored in configuration files that are stored in config/install/directory in the module root directory.

Although the introduction of configuration management initiative in Drupal 8 is meant to streamline the configuration management, it does not leave the Features module irrelevant. A 3.x version of Features will be integrated with the new Configuration Management System to provide options like “export bundled functionality”.

Valuebound is committed to growth of Drupal & community. We will be publishing more about benefits of Drupal 8 and how your business can make best use of new features. Feel free to reach out to us if you would like know more about our contribution towards Drupal.

Configure Views Contextual Filter In 5 Steps

Contextual filters are extensively used in scenarios that require filtering based on a specific context, which is not feasible using the standard filters available in Views.

We applied a contextual filter in one of our recent projects,a CMS implementation for a higher education institution. The project involved the creation of a slideshow display on specific web-pages assigned to different departments in the college. All the pages shared a common taxonomy vocabulary (department) with a separate taxonomy term for each department(e.g. Architecture, Biotechnology). A content type (department page) was used to create all the department pages. The creation of views block (slideshow) for each department page was unfeasible hence a single block was used along with a contextual filter to solve the issue.

Step 1 : Adding a Filter Criteria

We began by choosing “Content Type” as the filter criteria for all displays.

Choosing “Content Type” as the filter criteria

Step 2: Selecting a Content Type

We specified the “Content Type” as “Home Slideshow”

Configure filter criterion: Content type

Step 3: Enabling the Advanced View settings to configure a contextual filter

Enabling the Advanced View settings to configure a contextual filter

3.1 This was followed by opting for “Content: Has taxonomy term ID”

Drupal views - opting for “Content: Has taxonomy term ID”

Step 4: Configuring contextual filter : Content: Has taxonomy term ID

Then we configured Content: Has taxonomy term ID by opting for “When the Filter Value is not Available”, while choosing to “provide a default value”. The option to “Load default filter from node page” was checked and the default value was sourced from the “Taxonomy term ID from URL”. This was followed by applying the changes.

Configuring contextual filter : Content: Has taxonomy term ID - When the Filter Value is not Available

4.1 This is what the View Block Configuration Page looks like after the changes have been applied.

View Block Configuration Page after the changes have been applied

4.2 There is an option to test the contextual filter by typing it into the preview window and then opting for "Update Preview". Here is what the preview for this case will look like:

Drupal views - update preview

4.3 If you are familiar with the use of SQL Queries it would be worthwhile to turn on the display of the queries in the View preview display to keep a tab on what views will be up to when they are called.

Turn on display of the queries in the View preview display

Step 5 : Saving all the Changes

Now that you have learnt to configure a contextual filter, the key to applying it permanently is saving all the changes in the end.

Drupal views: Do not forget saving all the changes

Settings that you should be aware of

# What to do when the Filter Value is in the URL?

The “Override title” option here helps you alter the view’s title in case there is a contextual filter value present. Meanwhile the “Override Breadcrumb” option allows you the option of overwriting the view name in breadcrumbs. The validators associated with contextual filters are meant to ensure that the filters fit in certain parameters. The Contextual Filter Validation system may have numerous validators like basic validation, content, numeric,PHP Code, Taxonomy term and user that can be selected.

Drupal views: When filter value is in URL

In case the filter value does not validate, there are multiple options to choose from:

  • Display all results for the specified field
  • Hide View
  • Return Summary
  • Display contents of "No results found"

# How to allow multiple filter values while reducing duplicates ?

The Allow Multiple Values option inverts the filtering process by excluding the rows that match the filter criteria. This option allows several values for the contextual filters, as values separated by commas are interpreted by views as AND conditions while the values separated by plus signs are regarded as OR conditions. An example of allowing multiple values can be observed when several taxonomy term IDs are allowed to display the entire content marked with any of the terms.

Drupal Views: When there are Multiple Filter Values

The Reduce Duplicates option is meant to reduce the occurence of duplicate results due to repetition while filtering on multiple taxonomy terms. Although this option reduces duplicates effectively it makes the database query heavier. The standard functionality of a contextual filter can be effectively extended to cover filter ranges with the help of a module like Views Contextual Range Filter.

Valuebound is a key contributor to the Drupal community with a strong belief in having fruitful partnerships with our esteemed clients. We at Valuebound are committed to your business initiatives with our Enterprise level Web Solutions. Please contact us to know more about our service offerings.

Valuebound Signs Deal with ISKCON Bangalore to Aid Migration to Drupal CMS

We at Valuebound feel proud to be associated with an organization like ISKCON that is committed to charitable activities targeted at making major differences at a grassroot level. Valuebound will be redeveloping the ISKCON Bangalore website by upgrading the current Drupal 6 version to Drupal 7. This initiative is meant to make the website responsive and user friendly in order to improve user engagement.

About ISKCON

ISKCON (The International Society for Krishna Consciousness ) is a monotheistic movement that has captured the imagination of the masses worldwide. This movement is based on the spiritual teachings recorded in the Bhagvad Gita and is a remnant of the ancient vedic and Hindu cultural traditions. The ISKCON Temple in Bangalore is reknown for its serene surroundings and architectural beauty, figuring amongst the largest ISKCON temples around the world. ISKCON Bagalore has also been a prime initiator of the Akshaya Patra Foundation that ensures the implementation of the Mid-day Meal Programmes in Government and Government-aided schools across India.The vast international following ISKCON has acquired over the years speaks volumes about its international stature.

About Valuebound

Valuebound prides itself in being a boutique web services provider that keeps evolving with each project it undertakes. Valuebound is a key contributor to the Drupal community with a strong belief in having fruitful partnerships with our esteemed clients. We at Valuebound are committed to your business initiatives with our Enterprise level Web Solutions. Please contact us to know more about our services offering.

Tracking outbound website traffic on your Drupal website : Link Click Count

We proudly announce the release of Link Click Count, a Drupal module meant to track the number of clicks on specific links on a web page. This module helps you to monitor the web traffic, based on the number of clicks on a specific set of link fields on a particular web page.

Link Click Count gives real time information based on the user activity on any web page with link fields that may have internal or external links. This module can be a great aid in formulating an effective digital marketing strategy based on the user behaviour indicated by the clicks on certain strategic destination URLs on a web page. For instance, the count of clicks on a link leading to the Landing page on a website or download links for value-adding resources like e-books can help a digital marketer in fine-tuning their marketing automation strategies.

Installation Steps

The Link Click Count Module has three dependencies:

Link module
Views module
Views Distinct module.

These modules need to be downloaded and installed before enabling Link Click Count. The next step is to copy the entire Link click count directory to the modules directory (e.g. DRUPAL_ROOT/sites/all/modules) and enable the Link Click Count module at [admin/modules#edit-modules-fields].

Enabling link click count module for outbound website traffic analysis

Configuration

To configure the Link Click Count Module, the first step is to visit any link field setting page [admin/structure/types/manage/your-content-type/fields/]. The "Link Clicks Count Configuration" section has the option to "Save the clicks happened on this link", which will configure the module with ease.

Configuring Link Click Count Drupal Module

You can download the module here.

The Link Click Count Module can be a simple yet effective tool for Website Traffic Analysis. As the results generated are easy to analyse without any technical expertise required to infer them, this module is particularly useful for people from non-technical backgrounds.

If you have any suggestions to improve the module further or if you would like to add a customized version of this module to an existing project or a venture in the offing, feel free to contact us. We at Valuebound are committed to providing you with enterprise Web Solutions meant to turbofire your business initiatives.

Download the Drupal Guide
Enter your email address to receive the guide.
get in touch