Why I am finally switching from chrome to Brave

TLDR : Brave is fast, secure and a cryptocurrency driven (for marketing and fixing the ad model of web) browser. It is trying to fix the internet as we know today, by improving the ad model. Having known about it couple of months ago, I had been postponing my switch to Brave for lack of extensions support. Now they have started supporting chrome extensions and hence I am switching.
The Long Version
The thing with tools is that once you choose one and get used to it, it is really difficult to replace them. This is true even if the new alternative is much better than the old one. With the rapid pace of development today there is a tough competition and a close fight most of the times. With nightly builds and weekly releases, it is too taxing to compare the strengths of tools objectively on a regular basis. When was the last time you even considered an alternative browser. Do you compare the latest features of the popular browser every month? at-least once in every quarter? How about every six months? Well yes. Not many people do. I didn’t either. It is very rare that we go back to drawing room to review and decide what tools to use on a regular basis. It is too much of work. So we make the decision and stick to it until we are forced to change. We know that is not ideal but that is how we are all wired I guess. I am saying all this because inspite of all these I am switching to Brave and you might go through the same when you consider it ;)
Who is behind Brave
I first heard about this project almost an year ago during its ICO. I was curious about this project as it was co-founded by the Brendan Eich. He is best known as the creator of the ubiquitous Javascript programming language. He was also a co-founder of Mozilla, the organisation behind the open-source web browser Firefox. In addition to Brendan Eich the team has some great names with each of them being a pro in one critical feature of the project. Go checkout https://basicattentiontoken.org/about/ in details once you are done reading this article and you will know what I mean.
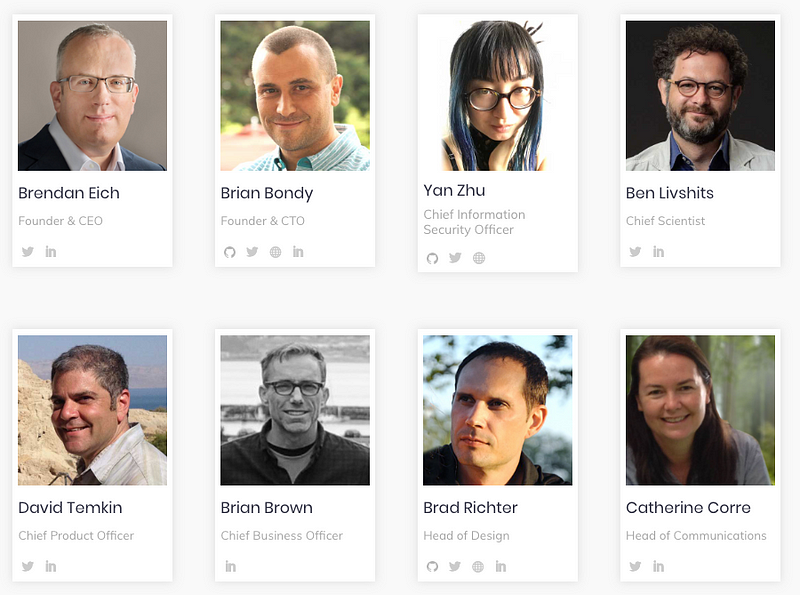
With such a great line up, people would definitely take note when the team speaks. In fact they have they have been making use of this quite effectively.
Features of the browser
If I had to put down the features of this browser in the order I like them the most it would be.
- Browse Faster
- Protect your Privacy — Blocks trackers.
- Httpseverywhere.
- TOR integration.
- Block Ads by default.
- Fixing the Ad model — Pay your favourite publishers.
- Marketing
- Chrome extensions support.
Browse Faster
Their website claims that the browser is upto 2 times faster on desktop and upto 8 times faster on mobile. I have not “run my horses” yet, but even during the normal usage I could see that the browser was way faster compared to other browsers. The browser start time is also very less. Personally this is critical for me. Couple of years ago though I liked everything else about Firefox I didn’t move to it, as it used to take very long for a cold start.
Protect your Privacy — Blocks trackers
I have been using this browser for only couple of minutes now and I can already see that it has blocked 129 trackers. I was really blind to the fact that there were so many trackers tracking me on every popular site I visit. I am a little more confident now that my personal data and patterns will not be sold to marketers without my consent. Brave did a good job of keeping track of these numbers and showing them visually on the browser. This will definitely raise the awareness.
https everywhere
This is more of a misnomer. I thought this would automatically convert all http sites to https sites. That is create a secure channel on the go. How foolish of me :P If the certificate is not installed on the server and website has not enabled https, I don’t think there is much the browser can do. But looks like I am not the only as I read couple of discussions regarding this where people assumed that “https upgrades” it will create secure channels. But looks it only means redirections when https version is available.
https upgrades means, sites and hyperlinks, that are linked to http:// and if a equivalent https:// site is available… brave browser, automatically changes those links to https:// equivalents, to prevent tracking etc.,
I think brave should rephrase this as it can be misleading. If you have not yet decided to use brave you can use the httpseverywhere extension. After having realised what “httpseverywhere” it is no more a killer feature I thought it was. But I am leaving it here in this position, as many people might misunderstand it like I did.
TOR Integration
Though I have read couple of times about TOR I have never really found the need to need to use them. While that is one of the reasons, the other is that I am lazy. But looks like Brave is making using TOR very easy.
When you open a new private tab brave shows this message. Now you can start using TOR with a private browser. Isn’t that cool?
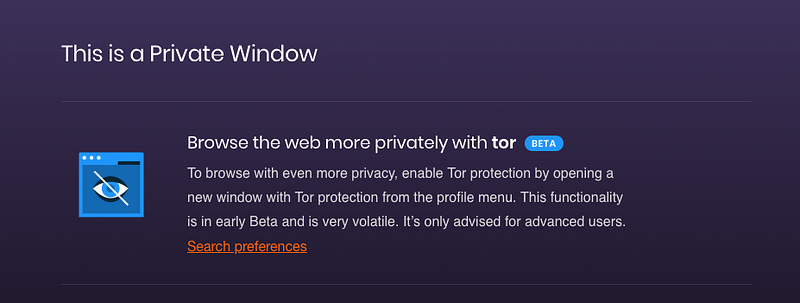
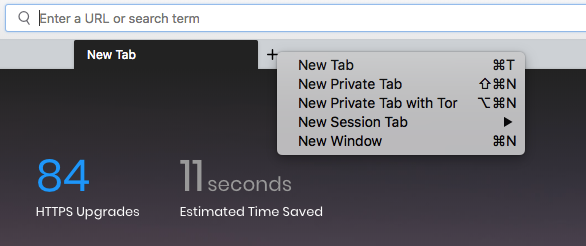
You can start a new private tab with TOR, by doing a right click on the new tab icon in any one of the existing tabs.
The documentation is not clear about how to open a “New Private Tab with Tor”. I think Brave should change the message on the first screen so that people have clear instructions about using this feature.
Blocks ads by default
I have never used ad blockers until recently. Having managed a couple of small websites in the past, I realise the issues of the publishers. If most users start using “ad blockers” then the publishers will have to find alternative sources of income. Since there were none, I never felt using Ad blockers. But now Brave is coming out with a very good solution for this problem, which we will discuss later.
However while going through the brave download page I came across a new information that was surprising. We never realize that we might be paying substantial amount to ISPs for downloading ads and trackers which we don’t want. So I was naturally surprised to find out the actual figures. Brave claims that it is $276 for an year.
The average mobile browser user pays as much as $23 a month in data charges to download ads and trackers — that’s $276 a year. Brave blocks ads and trackers, so you don’t pay for them.
Now that brave has an alternative revenue model I think we can safely start using “Disable ads and trackers”.
Timing
You can get everything else right but if your timing is wrong there is nothing much you can do. We all know of many of our favourite projects which got everything right but failed to get mass adoption just because they were either ahead of time or they were late. So timing is very critical.
I think brave is entering the markets in the right time. Following are couple of reasons I think that timing is right.
- Facebook sells personal data — http://fortune.com/2018/04/10/facebook-cambridge-analytica-what-happened/
- Google might face record fine in Android monopoly case — https://www.expresscomputer.in/news/google-might-face-record-fine-in-android-monopoly-case/25864/
- 50 millions Facebook accounts might be compromised — https://www.cnbc.com/2018/10/02/facebooks-muddy-account-breach-response-could-be-the-new-norm.html
- Time Berners Lee starts Solid — A web where the users have complete control over their data. https://medium.com/@timberners_lee/one-small-step-for-the-web-87f92217d085
- Blockchain and Cryptocurrencies are here to stay (Brave is using them. Read in the next sections below) — https://www.finpipe.com/why-blockchain-is-here-to-stay-2/
Revenue Model
Digital advertising is broken and online publishing is dying a slow death. These are interrelated and one cannot be fixed without fixing the other. In the words of founders of Brave “It is a market filled with middlemen and fraudsters, hurting users, publishers and advertisers.”
The Basic Attention Token (BAT) was developed to address this. BAT, an ERC20token built on top of Ethereum, will be the token of utility in a new, decentralized, open source and efficient blockchain-based digital advertising platform.
In the ecosystem, advertisers will give publishers BATs based on the measured attention of users. Users will also receive some BATs for participating. They can donate them back to publishers or use them on the platform.
This transparent system keeps user data private while delivering fewer but more relevant ads. Publishers experience less fraud while increasing their percentage of rewards. And advertisers get better reporting and performance.
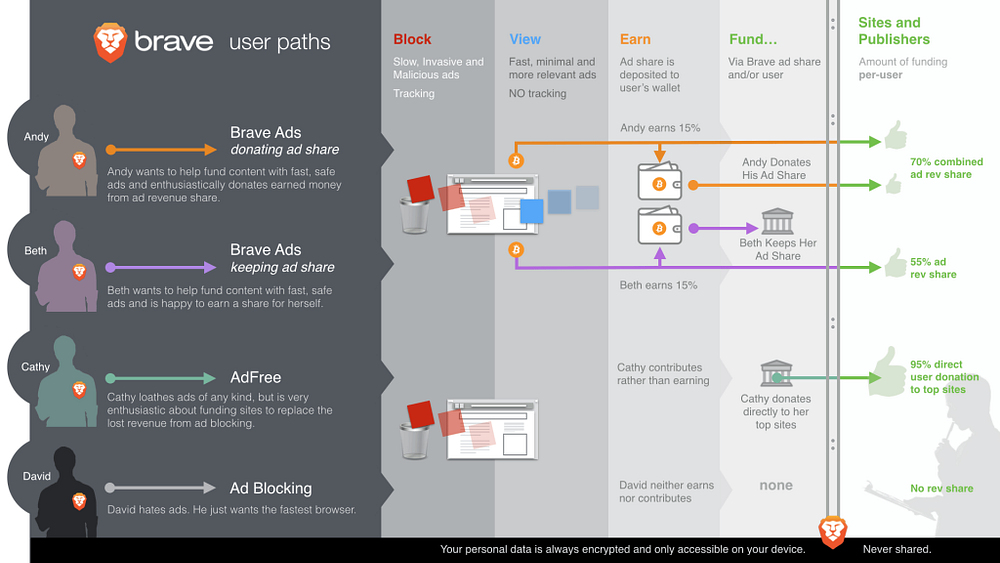
The following revenue split seems to be fair enough and looks it is taking everybody’s interest into consideration.
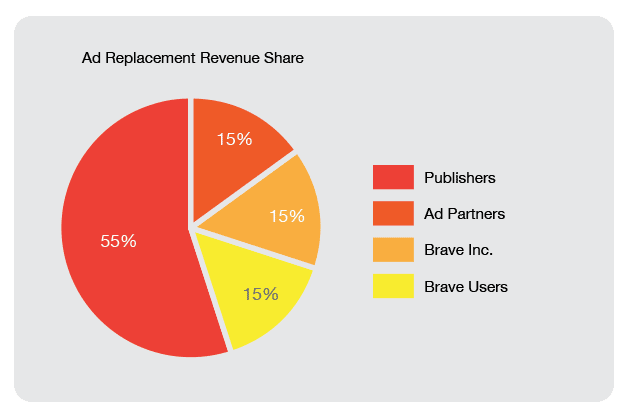
The best part is that Brave is not forcing anything upon the users. Based on your preference you can choose any of the paths below.
It is heartening to see that Brendan and team are not going for token liquidation are privately funded. This shows their commitment in the product for the long term. Not everybody can have this luxury. But it definitely boosts confidence to know that they are thinking long term. Browsers will take time for adoption and having deep Marketing
Best viewed with Chrome or Firefox
We have all see the following message on various websites couple of years ago. Developers liked these browsers as it was easier to code front end of websites for these browsers. Naturally most of the websites started promoting these browsers as well.
But their association with the browsers pretty much ended there. With Brave the scenario changes. Since the publishers can get paid for their efforts and content, they have a vested interest to promote the browser. Whether the revenues from this source will be sufficient to replace the revenues from ads is something that we need to wait and watch. But it can already be considered as an alternative source of income.
Marketing Budget
While there are examples of open source projects like Linux, Apache etc gaining popularity even without much of marketing, marketing is critical especially for a browser to gain traction. Looks like Brave it not shying here. They are spending real dollars on customer acquisition.
5 USD Custom Acquisition Cost
For every active user converted, I think Brave is paying close to 5USD. Not many publishers might depend on this. But for the new model to gain adoption and challenge the big wigs like chrome and Firefox, the number of users using this browser should definitely sky rocket. When the product is good, don’t underestimate the power of referrals. We all are aware of how Paypal referrals snowballed and made it a house hold name in a very short span of time. Don’t be surprise if the same happens to Brave browser.
I just added the following banner on my website bakkt.com/blog/company/introducing-bakktom/blog/company/introducing-bakkt

You will start seeing images like below very soon on many publications going forward. Get used to it. Online publishing industry have been dying a slow death. Everybody is looking for a way out, but nobody is able to figure out a model that is a win-win for the reader and publisher. If Brave can do that I am sure that most of the publications will flock to this model. But again it will all come down to crossing the critical mass. It is good that Brave is privately funded and they seem to be ready to burn money until they cross 15 Million Monthly Active Users.
Positioning
Brave is trying to position itself as the privacy centric browser. Google’s chrome which was the David against the Goliath(Internet Explorer) has now become the new Goliath and Brave is positioning itself as the new David. Recently Brave filed a privacy complaint against Google. This could be huge if Google lands up on the wrong side of the verdict. It will not only help Brave garner the much required publicity but it will also help cement its position as privacy centric browser and representative of the common man against the monopoly of Google which could play well for Brave over the coming years.
Support for chrome extension
Regarding moving to chromium base the blog says
Which we believe will allow us to focus more fully on Brave features and less on Chromium upgrades and basic browser work.
I think this is a brilliant strategy. Google is doing a great job of making chrome fast and cutting edge. The problem with chrome has been with respect to the overreaching control it will have once we start using their browser. So this approach of Brave is a master stroke I would say.
If you want to give the latest version a try you can checkout the brave dev version.
Since the dev version uses the chromium it also means that the chrome extensions are now supported. I installed a couple of extensions to check them out and they are functioning without any issues. This was a major hold back and now I have moved to Brave.
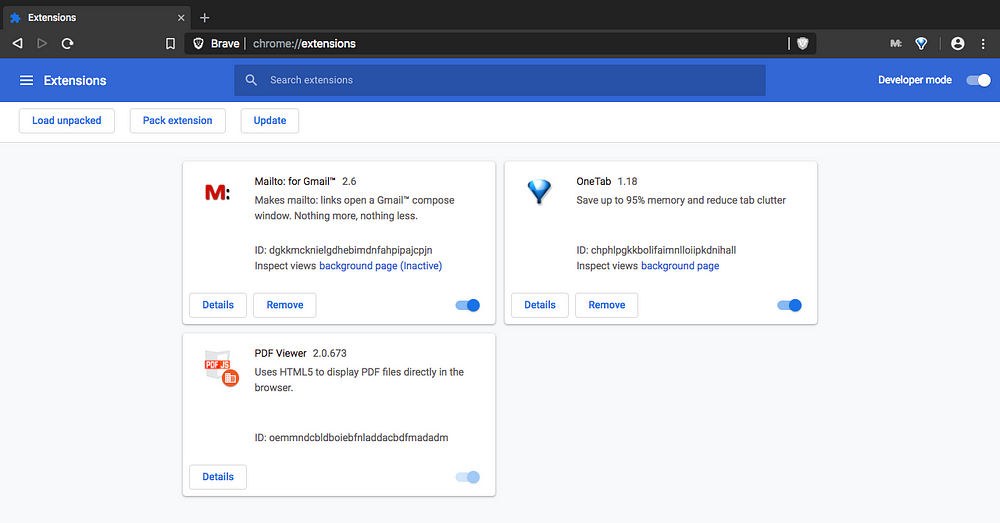
I am still using chrome for the dev tasks but have moved to brave for general browsing.
The big Picture
Basic Attention Token team is playing in the field of Attention economy and Digital advertising. They have realised the browser is a critical component for this and hence are concentration most of their resources on the browser. This seems like a very interesting approach to solve the Digital advertising. They are in it for the long run and they have got their priorities right. So for now I am bullish on BAT and brave. If you want to know more about BAT do read What is Basic Attention Token article
If you are already using Brave do let me know how has your experience been. Also what do you think of BAT? For official updates you can checkout Basic Attention Token