Newly introduced mobile first Menu management in Drupal 8

In this post, we'll continue site building by adding menu items to our newly created Drupal 8 website. We will create custom menu which'll be used to display links, then assigning these links to a page. We will also add a menu link to specific region within the theme for demonstration purpose.

Managing Drupal menu happens within administration sector. To begin, login as an administrator in your website.

Although there are several default menus available in core, we have ability to create custom menu using admin interface. This has to be done in two parts, first is to create structure of the menu and the second is to add links to it.

Step 1: Create a Menu
To create a menu, visit Manage >> Structure >> Menus

structure_listing

In Drupal 8 menu is categorised in 4 sub category

  1. Administration
  2. Footer
  3. main navigation
  4. Tools
  5. User account menu

Administration menu
By visiting admin/structure/menu/manage/admin you can view list of all admin menu including parent child menu on this page

Content, Structure, Appearance, Extends, Configuration, people, reports, Help are part of admin menu.

admin_toolbar

Footer Menu

Visiting admin/structure/menu/manage/footer page will  list out the footer menu items.

footer_menu

Main Navigation Menu:

You can view all main navigation menu items under admin/structure/menu/manage/main .

main_navigation_menu

Tools:

Browse the admin/structure/menu/manage/tools, it will list out shortcut icons available in sidebar block region

toolbar_menu

User account menu:

This will list out user related menu items e.g: My account,  Log out,  profile.

user_account_menu

Step 2: Add Menu Links

In the previous step we have learned about different type of menu available in Drupal core. Now lets create our own a new menu. licking on the +Add menu button. You also have option to create a new menu category by visiting admin/structure/menu and clicking on +Add menu button.

Step 2.1
We are going to create a new menu category and add links to the same. once we filled up Title and summary, click on Save button. This will redirect to add link page.
 

creating_custom_menu

Step 2.2
On admin/structure/menu/manage/. you will find Add link option

adding_menu_link

The page redirect to menu configuration. where we can provide specific title with pointing node id, description, weight. node enabled disabled option.

Step 3: Assign the Menu to a Block
Once the menu is created we can assign this to specific region in our website.
Visit admin/structure/block and click on any of the region where you would like to place the menu block. I am assigning to Secondary menu. Click on place block and search for our new menu block.

placing_block

We can Configure the drupal blocks based on different criteria like:

Content types: This option list out the available content types where we can assign if the block should be displayed or not for selected ones.

visiblity_by_content_type

Pages: In this tab we can configure block visibility based on page url or by node id. We can have add multiple node id, each in new line.

visiblity_by_page

 Roles: Using this option we can decide which role(s) can view this block ?

 this tab will list of roles available in your site. We can check one or more than one roles for visibility setting.

 visiblity_by_role

We can rename the block title as well as have option to enable/ disable them.
Once you have done with all the settings click on save block button.

configuring_block

As I have selected show for the listed page “”. and Region as “sidebar Second”, it will be displayed in front page only.

Now we can review our block in the region.

menu_block_assigning_to_sidebar

From site building perspective, menu UI is similar to what we used to have in Drupal 7 ut from the architectural point of view, the routing system in Drupal 8 has been built using Symfony components. I will be covering this in my future blog post.

Getting Comment on your article

The best way to communicate with online reader is allow them to give feedback or add comment on your article. Comments are great way for communicating with readers and the community. 

The functionality has changed a lot in Drupal 8. In Drupal 7, the comments system was quite simple. You could use them on content types and have only one single comment type. But what about if you want this different comment form for different  content  e.g. sometimes we need user to add feedback with just two fields, name & message and in another content type we need review system where besides name & message, user should rate the article based on some scale. 

To address these limitations, comments system has been rebuilt in Drupal 8. It could be attached to any entity type by adding a "Comments" field. Now you can have multiple comment types. This also help us to differentiate many type  of things like having public /or private comments on a single bundle.

In this Tutorial we are going to explore:

  1. Adding Comment to Content Type
  2. Creating Different comment Types

1. Adding Comment to Content Type

Step 1.1: Go to Manage >> Structure >> content type and select Article content type & click on Manage fields

content_type_list

Step 1.2: Click on +Add field. ou will be redirect to Add field page where you can select comments as new field or you can just Re-use an existing field from your site. 

Add the label name and click on Save and continue.

adding_comment_as_field

Step 1.3: Select comment type from the two option - Default comments and visitor. Click on save field settings.

manage_comment_field

Step 1.4: Add comment setting for Article content type and click on save settings. these settings holds label, help text, required box, Default value (open / closed / hidden), comment per page, comment threading, Preview comment (Disable / Optional / Required). Once you have filled up all the required data click on save settings.

comment_setting


Step 1.5: So, we have selected Comment type as “Default comments”. To check the setting for the same go to /admin/structure/comment and click on manage field under “Default comments” type.

comment_type

2. Creating Different comment Type
In the previous section we have enabled comment for our content type. Now we are going to create a new comment type itself to be used with another content type.

Step 2.1: Go to manage >> structure >> Content types >> comment types
and click on +Add comment type.  Fill up label, description, target entity type and click on save.

comment_type_adding

Step 2.2: Once Comment type has been added click on manage fields. Add the choice of field to your comment type. Below I have added Email field.

mange_field_on_custom_comment

Step 2.3: Once you have done with adding up new field go to content type listing page and click on manage fields.

On click of adding comment, you’ll be redirected to comment type selection page, where you can choose your custom comment type and click on save field settings.

custom_comment_listing_in_drop_down

Step 2.4: Next is to configure comment for the content type.

comment_setting

Once you have saved the fields, we can view the same by visiting any article. Your article should have  custom comment type “Article comment” with additional field Email.

custom_comment_with_email_field

Now you should be able to add new comment types with specific fields for different content types of your project.

How to use views in Drupal 8

The most installed module in Drupal “Views” is now available as the core modules of Drupal 8. Now you don’t have to search for the latest version of views separately.

For the 1st timer, Views allows you to generate dynamic query using easy to use UI. That's the simple explanation, but it doesn't give the module the credit it deserves.

For instance, you can create a page (/latest-news) which displays all the latest content by bundle type and sorted by posted date. Using the module, you can display content in a block, table or formatted structure.

In this article, we'll continue building our new site by adding up few more custom views. We'll create a view page to showcase news on homepage, and a "Recent News" block.

So, Let’s Begin with View page creation.

Step 1: Go to Manage >> Structure >> Views >> click on +Add new view

admin_structure_page


add_a_view


Step 2: Clicking on +Add new view redirects to “Add new view” page.
The page has View Basic information fieldset that contain View name and Description.

Section 2 has VIEW SETTING which has option to  show, type, and sorted by.
Where, Show means what would you like to Display, Comment, Log entries, Files, Content, Content revision, Taxonomy Terms, Users, Link Count, Custom block revision or Custom block.

Of type holds bundle type either Article, Basic page, custom content type or All.
Sorted by - How do you wants to sort? Sorting by Newest first, Oldest first, or by title; these are the initial level sorting options. Later on you will get more and more sorting criteria e.g.: by author name.

creating_view

The Addition of new view also carries PAGE SETTINGS & BLOCK SETTINGS.
Once you check on “Create a page”, this will open up page configuration section which, includes page title, page path, Display format, item to be displayed, with three additional option.

  • use a pager.
  • create a menu link &
  • include an RSS feed.   
view_page_settings

Checking the block setting Will allow you to create a “view block”. This section has option to update Block title, Block Display settings, items per block with pagination option.

view_block_settings

Once you are done with filling up these fields value. click on save and edit button. i’m creating view page and view block both in in this example.

view_page_with_view_block_info

Step 3: Once you have saved the view page data, page will be redirected to view Display configuration section having page and block UI.

Just like Drupal 7 views contrib module, Drupal 8 views also has similar UI.

As we can see here view has multiple configuration.

Title : set the title for view page.
Format: How data has to be displayed on the site.
Fields: what are  fields you would like to display.
Filter criteria: allow filter by type as well as option to  expose the same.
Sort criteria:  sorting of field date ascending or descending manner.
page Settings: set the page path, assign to menu if required, view permission.
Header: custom header for the view page.
Footer: custom footer for the view page.
No Result Behaviour: In case if view query fetches no data or empty set, we can set option to override and display custom message to user e.g. no search result available, please try again.
Pager: allow site to create pagination on view page.
Advanced: As the label suggest, this section has advanced  options like CONTEXTUAL FILTERS , RELATIONSHIPS, EXPOSED FORM, OTHER etc.         

You can check my previous blog post on how to use contextual filters in Drupal 8 for mode details.

views_contextual_filter

Now, let’s start with view page configuration.

We will add a filter to display only content from news.  

To add a filter go to FILTER CRITERIA section and click on Add button. This will show pop up box, where you can search by Type or search by name. As we are filtering based on content type this can be done in two ways -

  1.  Select Content in Type dropdown and search for Type.
  2.  Write type in Search box and select appropriate.

Select the checkbox next to Type and click on Apply (all displays).
 

view_filter

Once Type is selected, you will be redirected to configuration page where there is option of “Expose this filter to visitors, to allow them to change it”. Under the content types you can select single or multiple bundle selection option and also have Operator. Once you have set the configuration click on Apply (all displays).

views_filter_criteria


Moving to SORT CRITERIA, click on Add button. I am filtering content based on news posted date in Desc order.

  • Under Type drop down select content.
  • Search for Authored on and click on Apply (all displays).
views_sort_criteria

The below page shows configuration for filtering option e.g. Exposing this sorting criteria to the end users, sorting order either ASC or DESC and Granularity.

view_sort_configuration

Next go to PAGE SETTINGS. Here we we can set the page url path.


views_page_path

We can set the menu and assign this to specific category. Menu could be either part of admin menu, footer, navigation or tool menu. 

views_menu_page

Access has setting of permission, roles and none. This is helpful if you want to restrict or display specific page view to specific role or add a permission.

views_access_restriction

Once you have selected Role click on settings link. In my case I want to display this page only to Authenticated user. Anonymous user will get the custom configured message. Do not forget to click on Apply button.

views_access_role_option

Moving to “NO RESULTS BEHAVIOR”, select Global from “Type” filter. Check on Text area and Apply (all displays) button. Fill up content data and click on Apply (all displays) again.

views_no_result_behaviour_text_area

Now it’s time to display specific no of content on latest-news page. Go to PAGER >> Full click on settings link. This will redirect us to pager setting page.

views_pager_selection

Pager settings page has item per page, offset, Pager ID, Pager link labels, exposed options etc.

views_pager_option

We can add custom text for first / previous / next / Last page.

views_pager_link_label

There is additional Exposed Option to control selected option

Allow end user to control selected display options for the view.

views_exposed_control_option

Once you have done with view configuration click on save and review the page. Lets check our page now at localhost/drupal-8.0.2/latest-news

views_listing_page

Try changing the content type in views check the page if there is no content available. It would show custom message you have added earlier in views.

As we have restricted this view page for Anonymous user. if you visit you view page without login, you will get Access Denied page.

views_access_denaied_page

So, we are done with Basic Drupal 8 views configuration.


Step 4: Next we will cover Drupal 8 views Block. Go back to our view configuration page and click on Block.
Similar to views page it has all the configuration. I am adding block name as “latest news block” and saving the view.

block_admin_description

Now assign this “latest news block” view block to any region. Visit Manage >> Structure >>  Block layout

I’m assigning my view block to sidebar second. Search for latest news block and click on place block.

place_block

Now it’s time to configure block. configured item per block. visibility based on content type, page roles, and also it’s provide region and views machine name and click on save block.

configure_block

In case block view doesn’t have any data, it should display custom message.

block_listing_with_no_content

Attached is the screenshot for our views block assign to sidebar region to display only on page.

 block_with_content


Valuebound takeaway from DrupalConAsia 2016

DrupalCon Asia 2016 is finally over and I doubt all the Drupalers who attended have recovered from the hangover of the event. On the closing ceremony we got a great figure, it was the first DrupalCon for nearly 80% of the total 1025 attenedees, which is astonishing. Even for us, the team from Valuebound, it was the first DrupaCon. So in this blog I am jotting down our own experience and how much fun we had.

Valuebound team kickstarted volunteering from Day 0. How? We just went to see the venue where the DrupalCon Asia will be hosted right after landing in Mumbai, and reaching there we saw bunch of people working for the next day. There we met Rachel Friesen, event manager of Drupal Association, working with a bunch of volunteers. The next moment whole Valuebound team started working with her filling up badges for the attendees. Why? No reason. We just couldn't resist ourselves seeing the enthusiam of other volunteers.

The excitement was so much that we were all ready & geared up, reached the venue by 7:30 AM. Yeah you heard it right. 7:30 in the morning. We wanted to volunteer, we wanted to be a part of the DrupalCon Asia 2016, we wanted to contribute in any way possible. Rachel briefed us about our tasks in the help desk and we took our respective positions.

At around 8:30 people started turning up for the registration. But by 9 there were an array of attendees showing up for registration and in no time empty floor was filled up by a huge clan of Drupalers from different parts of the globe. It was great to see such a colossal crowd assembled together with one thing in mind, Drupal

But this section can't get over without mentioning someone special. You guessed it right. When Dries Buytaert showed up to take his badge, he was sorrounded for a selfie by all the Drupaler for whom he was a superhero. With that a new term was coined by Rachel "Driesie", a selfie with Dries.

2

On the eventful Driesnote the whole auditorium was packed with all the attendees. Prior to the Driesnote there was a special Bollywood style prenote by Jeffrey A. (jam) McGuireAdam Juran and Campbell Vertesi which was concluded by nearly all of the audience converting the stage to dance floor. Prenote was real fun. We are going to remember this for long time.


The Driesnote was a proud moment for whole community but there was something special for Valuebound. We were in his slide. As the number one contributor to the Drupal 8 project from India.


Following the keynote by Dries, there were the series of session on various topics raging from Backend development to Drupal Community for absolute beginners to experience Drupal ninza. Though it was not possible to attend all of them but we made sure that we make most out of it.

The session on PHP Fig by Jam and Campbell Vertesi was the first one that we attened. Don't worry I am not writing about all the sessions that we attened. This was exclusive for us because of the chat we had with them after their session. They were really impressed by us and our approach of how we have adopted and contributed to Drupal 8. Instead of we asking them about their experience they were more interested in knowing about what we feel about Drupal and how managed to cope with Drupal 8. That was one of the memorable moment for us.

Rest of the day we were attending other sessions, voluteering/monitoring of the sessions, wandering around the booths by all the sponsors who were giving a lot of goodies for the attendees and connecting with the hot shots of the Drupal world.

One of the most intriguing element of such large scale meetups is that we get to connect to so many folks of the community which really makes you feel blessed to be a part of such a huge family. Some met their mentors with whom they were only acquainted via IRC or the virtual world, some met their colleagues from previous organisations, some got to meet their idols who they follow. DrupalCon really opens up the Drupal cosmos which I believe is a real impact for everyone's Drupal journey.

For Valuebound it was a great experience and we realised that we have a great visibility in the Drupal community which which made our determination stronger to take this to the next level, as a Contributor and as an organisation

I know it has been a long blog post but come on, it was DrupalCon Asia. In fact it is just the tip of the iceberg. But a picture is worth a thousans words. Here is an album of the pictures we clicked on our tour to Mumbai and DrupalCon Asia.

DrupalCon Asia 2016

In the conclusion we would like to thank Megan SanickiRachel FriesenAmanda Gonser & many other volunteers and of course Drupal Association for organising DrupalCon Asia which was a dream for whole Indian Drupal Community. Hope to attend more DrupalCons in the coming years.

Manage your articles using Taxonomy in Drupal 8

Taxonomy is one of the features that add lot of advantage to Drupal compared to many other CMSs open source as well as proprietary.

Taxonomy is all about organizing your site by assigning descriptive terms to each piece of content.

While you can organize your content based on content types and creators, you might also want to view content based on what the content is about. Taxonomy allows you to associate terms with your content, which you can use to organize and display content on your site. Each set of taxonomy terms is part of a category set that you define, and is called a vocabulary. Terms in vocabularies that can be further broken down and can contain sub-terms.

In this session we would learn

  1. How to create vocabulary
  2. How to add term to those vocabulary
  3. How to add terms to content type


1. How to create vocabulary
Go to Manage >> Structure >> taxonomy, here by default we have Tags vocabulary.
at this place we can add vocabulary by clicking on +Add Vocabulary


Add Vocabulary

Please provide Vocabulary name and short description for new vocabulary and click on Save button.


Add Vocab Geners of Books


2. How to add term to those vocabulary?

clicking on save button will redirect to term listing page of our new vocabulary. now click on +Add term


Adding term

Once you have added all the term, you can view all of them on admin/structure/taxonomy/manage//overview


term listing


3. How to add terms to content type?
go to Manage >> Structure >> Content types

click on Manage fields for the content type , for whom you would like to add  taxonomy field.
in my case i have selected Article content type.
to add taxonomy click on +Add Field


Adding field


On settings page add no of term. limited/unlimited value selection from user end


Field setting


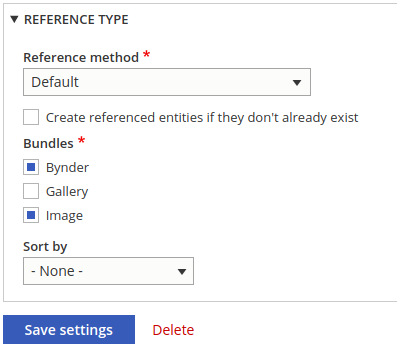
on this page admin can configure settings for taxonomy like label, help text, default value, reference method and choose vocabulary and click on Save settings.


content type setting for article

So, we are done with adding new taxonomy term to Article content type. Now we can go to content >> Add content >> Article >> Create Article


Create article


As we can see our custom taxonomy field “Geners of Books” with widget type autocomplete. you can change the widget type to Autocomplete, Select list from manage form display

Now it’s time to create content and test.
i’m too lazy to create content, so i have used devel to generate multiple nodes for the same content type.

page view

Clicking on Poetry at the bottom will redirect to taxonomy term listing page with specific term
url: drupal-8.0.2/taxonomy/term/14

In above URL replace drupal-8.0.2 with your own folder name or domain name where Drupal is installed.

Valuebound Decks Out for DrupalCon Asia

In less than a week from now the biggest event of the Drupal world is going to happen - DrupalCon and this time it's happening at a place which is the second highest contributor to Drupal, INDIA. Drupalers from India have been waiting for this grand event to witness the largest gathering of the tribe.

The city of dreams, Mumbai will be hosting the DrupalCon Asia 2016 at IIT Mumbai. The 'who's-who' of the Drupal planet will be there, thus will Valuebound. We anticipate being a part of this point of interest & occasion, and impart Happiness to everybody around us. We are already pumped up to meet all the rockstars around the globe.

Eleven of us are attending the DrupalCon Asia 2016, out of which one of our very own Karthik Kumar recieved a scholarship for the event for his contribution to the Drupal project.

Karthik Kumar DK

Ankit Babbar

Aditya Anurag

Elora Dash

Harika Gujulla

Mahaveer Singh

Neeraj Kumar

Malabya Tewari

Rakesh James

Rakesh James

Aneesh

Aneesh

Manoj

Manoj Kumar


We can't just wait to leave Bangalore for a week of awesomness, learning and self realisation of being a part of such a huge family called Drupal community.


NGINX default configuration file for Drupal 8

After a couple of hours struggle with Nginx default file to run Drupal 8 production website, we found the solutions for the following problems.

  • Image style is not generating in Drupal 8 with Nginx.
  • Images are not loading with different image styles like thumbnail, medium, etc
  • access denied for the images in Drupal 8 with Nginx
  • access denied /sites/default/files/styles/thumbnail/public/pictures/  Drupal 8 nginx 

Using following default file, we are able to solve all problems addressed above.

And also added couple of tips for following questions,

How to make access rss.xml in Drupal 8 with Nginx?

      # RSS Feed.
      location = /rss.xml {
        rewrite ^ /index.php?q=rss.xml;
      }

How to make access sitemap.xml in Drupal 8 with Nginx?

      # Sitemap Feed.
      location = /sitemap.xml {
        try_files $uri /index.php?q=sitemap.xml;
      }

Understanding Block layout in Drupal theme structure

Block system in Drupal allows us to add content into regions. A block could be text or listing of content using Views.

In Drupal 7, lock options were limited.  One block can only be assigned to a single region and have very basic control of hiding and displaying it.

To overcome these limitations in Drupal 7 we had option to use Panels to add fields to blocks.

In Drupal 8, the Block system became more flexible. Biggest  improvements are - assigning single block to multiple regions and fieldable block types.

In this article, we'll show you How to work with new Drupal 8 block architecture. We'll be adding a block that will only appear in the sidebar of Article pages. Then we'll create a custom block type which will be used to create reusable promotional content. This can be added to any blog post.

A list of new things introduced in Drupal 8 block architecture -

  • Blocks in general can be used multiple times.
  • Block title has now on/off option.
  • Easier and improved UI for new blocks.
  • Configurations of block types and layout are now in code!
  • Permissions are still limited
  • and now we have fieldable block types.

Lets’ Begin!

In Drupal 7, the Block module handles placement of a block and allow you to create static blocks. In Drupal 8, it has  been separated  out into two different modules.

The Block module handles placement of the block and  "Custom Block" module implements a new entity which allows you to create block content. We can create different block types and they're fieldable.


How to create a Static block and configure it?

Step 1: Go to  Manage >> Structure >> Block Layout >> Custom block library

Block layout


This page has Two tab Blocks and Types. lick on +Add custom block or custom block link visible on the same page.


Step 2: This page is similar to Drupal 7 block creation page which has block description with body field and Revision information.


adding custom block


Fill all the field values and click on Save button.


Add custom block


Step 4: Once the block has been created you'll be redirected back to the "Custom block library" page.

At this point the block is disabled and needs to be added to a specific region. Click on the "Block layout" tab and scroll down to "Sidebar second" and click on "Place block".


Place block


Step 5: Clicking on  “place block” will redirect you to the block configuration page. Here we have title field with new enable/ disable option, which is newly introduced in Drupal 8. We still have visibility setting based on Content type, pages, roles and region assignment as it was in Drupal 7.


configure block


we have assigned our new block “About us” to Sidebar second region. We can view our custom block to sidebar second in the site.


block in sidebar


2. Custom Block Content

In Drupal 8 "Custom block" allows you to create the actual block content and custom block types. By default you get a block type called "Basic block". This type is very basic and has a single field: the Body field.


Step 2.1: Go to  Manage >> Structure >> Block Layout >> Custom block library >> Types


custom block libraray


Step 2.2: Clicking on ‘+Add custom block type” will enable you to create block content type. Fill up label and description, check revision if you wish to and click on Save button.

add curom block type


Step 2.3: Now, we can view our new Block Content type is listing under admin/structure/block/block-content/types.

Custom block library


Step 2.4: Next step is to adding fields to Block content type. Click on “Manage field” and add fields. This is similar to adding fields to content type.

Manage fields


I have added few of the fields to provide additional data to the content.

Manage fields


Step 2.5: Once new Block content type has been added, it will start listing on  block add page.


Custom block

Click on “Contact” and fill up detail.


Add custom contact block


Step 2.6: Once the block is created, it will be listed here.


Custom block library


Step 2.7: Click on your custom block and fill up the required details and save it .

filling attributes for block


Step 2.8: Now, it’s time to place our new block.

Go to Block layout. and click on “place block” under any of the region. In below screenshot i am assigning the custom block to “Sidebar first”


About us for site


Step 2.9: Proceed with basic block configuration and click on save block.


About us for site


we have completed configuration with placement of new custom block. We can view this in our web site.


block showcase in front page


How to customize the appearance of your new Drupal 8 Website

Drupal comes with inbuilt Drupal themes. Once you have installed Drupal 8 you might want to customize the website appearance. This is one of the initial processes that needs to be set while setting up Drupal. Deciding about your design early will go long way to save time and effort iterations later. Drupal 8 provides few built in Drupal themes that come up with the same package like Bartik, Stable, Seven, Stark, Classy.


If you don’t find any of the above in the given list then go to Drupal directory core/themes. Open any theme info.yml and change hidden: true to hidden: false.


Drupal 8 has a mobile-first approach. All built-in themes in Drupal 8 are responsive. It comes with an admin theme that adapts to different screen sizes, and a ‘Back To Site’ button to go back to the front page. Tables fit into any screen size, and the new admin toolbar works well on mobile devices.


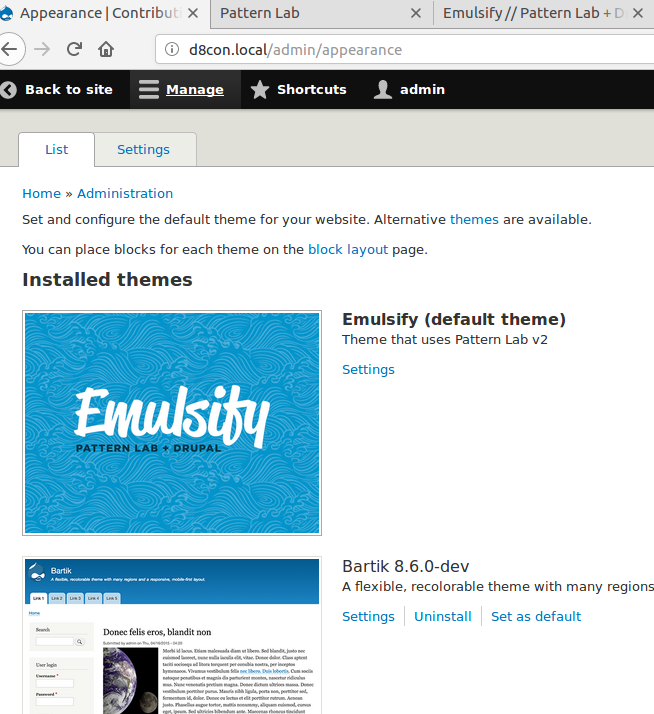
Drupal 8 Appearance page

There are quite a few of Drupal themes available for Drupal 8 at https://www.drupal.org/project/project_theme . We will see more of themes being migrated from Drupal 7 to 8 within next few months.

Installing a new theme is quite simple.

1.Download a new theme.
2. Follow README or Drupal INSTALL Instruction files in the package to check theme specific instruction and steps if any.
3. Upload theme package to a new directory in the themes directory in your Drupal site.

drupal 8 installing new theme

4. Clicking appearance tab will show all themes including recently installed theme localhost/drupal-8.0.2/admin/appearance Edit your user preferences and select the new theme. If you want your new theme  to be default theme for all users, check the default box in the theme administration page.

Drupal 8 listing new theme under uninstalled section

5. Once theme is enabled, it will be listed under installed theme section.

Drupal 8 installed theme

6. To change theme setting click on  “settings” link. You will be redirected to
localhost/drupal-8.0.2/admin/appearance/settings/new_themes

In this page we have option for

TOGGLE DISPLAY
       user picture in posts (check to show user picture in post)
       user picture in comments(check to show user picture in comments)
       user verification in comments(check anonymous / authenticated user before posting any comment)
       shortcut icon()

LOGO IMAGE SETTINGS
        use the default logo supplied by the theme(admin can change the site logo)

SHORTCUT ICON SETTINGS
         use the default shortcut icon supplied by the theme (admin can change the favicon)


Drupal 8 theme configuration page


Drupal 8 newly installed theme view


Using the Content Type to manage content consistently

In previous blog post we have installed Drupal 8 on our system manually as well as using Drush. Drupal 8 Provides two built in content type Article and Basic page. We can use this to create pages. But most of time we need to either add fields to these content types or we just need to add new content type to organize the content better.

Probably the first change site builders will notice in Drupal 8 are the changes to content types and fields. The field changes affect not only content types, but any entity that can have fields e.g. taxonomy or user profile.

When we edit any content type, there are  some differences in the tabs compared to Drupal 7. No more comment fields and display tab. And now we have a new tab: "Manage form display."

Drupal 7 Article “edit” page

Druapl 7 article edit page

Drupal 8 Article “edit” page

Druapl 8 article edit page


In this article i’ll explain followings -

New fields / Adding a new field
Managing fields
Form modes in Drupal 8
Comment form configuration

New fields in Drupal 8

Let's add following five new Fields available in Article content type.

Date, E-mail, Reference, Link & Telephone

We will add these fields step by step.

Step 1.1:  Select “Date” in Add a new field. Let's add the Label as “published Date”.

Druapl 8 adding new field

Step 1.2: Add some value to Allowing no. of values under field settings tabs for limited or unlimited option. Click on Save field settings.

Drupal 8 field setting

Step 1.3: Add the help text and Default value if require. You can select either Current date or  Relative date and hit Save settings

Drupal 8 field configuration page

Now “date” field is available  under Manage Fields on Article

Drupal 8 new filed listing in Content type

Managing fields in Drupal 8

Manage fields only controls how data is structured, where we can configure each fields for our content type.
But under managed field we have an option to hide a specific field, change the widget type, perform inline field setting and save the configuration. In Drupal 8 these two actions are separate.

Drupal 8 manage form Display

Fields which had “Hidden” property would come under Disabled section.

Drupal 8 field Disabled

If we click on gear icon for any of the field item, it will open the field setting section.

Drupal 8 inline form setting

Form modes in Drupal 8:

Drupal 8 has form nodes. so if we go to structure then display mode and select form modes, we can add new form mode. For our content type we can add a new one “generic form mode” and save it.

Drupal 8 form Display

Step 3.1: Once we click on form modes we will be redirecting to entity type. As we have assigned form modes to content type, we will selecting Content

Drupal 8 choose entity type


Step 3.2: Now we will go back to our content types and click Manage form display.
scrolling down to bottom of the page, you will find “CUSTOM DISPLAY SETTINGS” as collapsed fieldset. Here we can select our new display form mode “generic custom mode” and save it.


Drupal 8 custom form Display

Step 3.3: After saving configuration you will get the drupal message with “configuration” form link on top. If you click on that, drupal will redirect to our new form Display mode “generic custom mode


Drupal 8 generic custom mode

This can be used for various real world use cases.  One  use case could be , people of different roles to be able to edit different fields.  we can create a form that includes the different fields for  each user roles.

Drupal 8 generic custom mode page

Comment form configuration:

In Drupal 7 we have  option to  add fields to comments on specific content types. But there was no option to add comments to entities such as users, taxonomy terms.

In Drupal 8 we can configure Comment forms independent of a specific content type. This means we can have a one comment form type for articles and another for other entity type.This also means we can reuse a comment form settings and ensure consistency across your site. Comments are added in the same way like any other fields and there is no a separate configuration tab for “Comment fields” and “Comment display”.

if you don’t want to add a Comment field to a content type, you can’t just override that per-item.

Drupal 8 adding comment as field


The comment form settings include:

Default value: Open, Closed, Hidden.
Comment form settings: Threads, Comments per page, Allow title, Show reply, Preview settings.

Drupal 8 comment form settings

Just now we saw, that the comment form settings are similar to the settings for any other field.

Drupal 8 provides Sitebuilders to do more out of the box. There are many excellent enhancements you'll want to know more about. You won't have to learn any crazy new concepts. The UI in Drupal 8 for managing content types and fields has been imporved a lot with great feature.

Download the Drupal Guide
Enter your email address to receive the guide.
get in touch