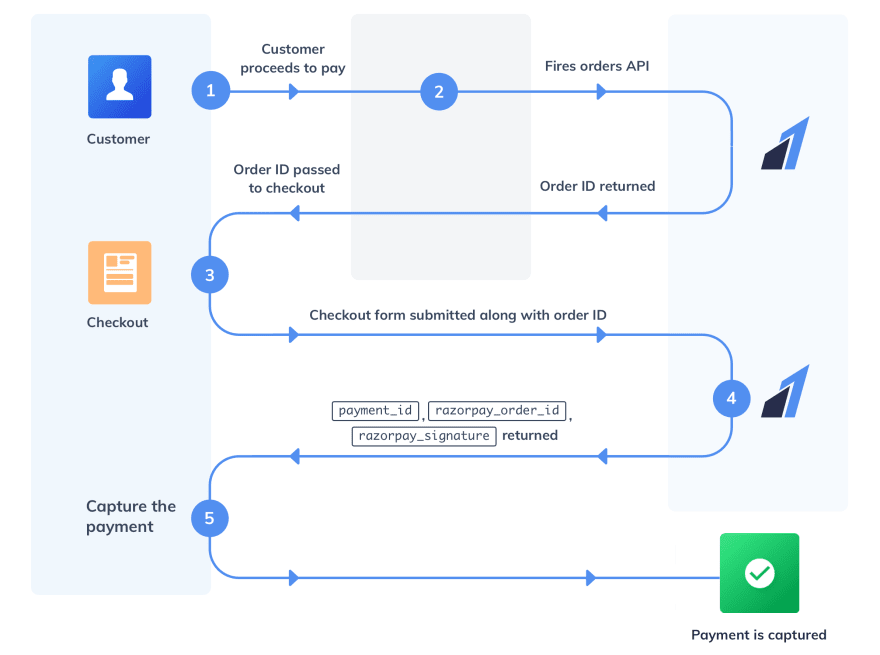
How Financial Companies Can Drive Digital Transformation With Cloud?

By rethinking their business models and embracing the innovative strategies of digital-only banking, traditional banks could boost revenues by nearly 4% annually, resulting in more than half a trillion dollars in additional revenues by 2025, according to Accenture. And as per the 2022 Digital transformation and Next-gen technology survey by Broadridge, about three-quarters of C-suite executives across top financial firms have successfully transitioned from paper to completely digital communications.
Cloud migration seems to be an easier road for financial services companies if they set the goal of digitizing and modernizing their everyday business functions. But, what constitutes a successful formula for driving digital transformation in finance using the cloud? “If there is one thing separating these digital transformation leaders from the rest of the pack, it is their capacity to fully embrace the cloud,” says Mark Schlesinger, former CIO of Broadridge Financial Solutions. Such an embrace needs advanced stages of digital transformation.
Only 28% of the digital transformation business leaders have been able to achieve the advanced stages of transformation across the company, suggests Forbes. And only 14% of the companies sustain digital transformation and see improved results. Challenges in achieving advanced levels of cloud transformation in financial companies can be listed as-
- Creating centralized data platforms
- Technological execution capabilities not scaling up their tasks
- Rise in expenses due to staled technological environment
- Inability to align digital capabilities and changing demands of the market
- Complex infrastructures choke data requirements needed for sophisticated analytics
Such advanced cloud technology implementation has been an enabler of success, and companies that have deployed such digital efforts derive multiple benefits. The firms that are struggling with that cloud transformation must develop a long-term plan based upon the exact business outcomes desired from cloud deployment.
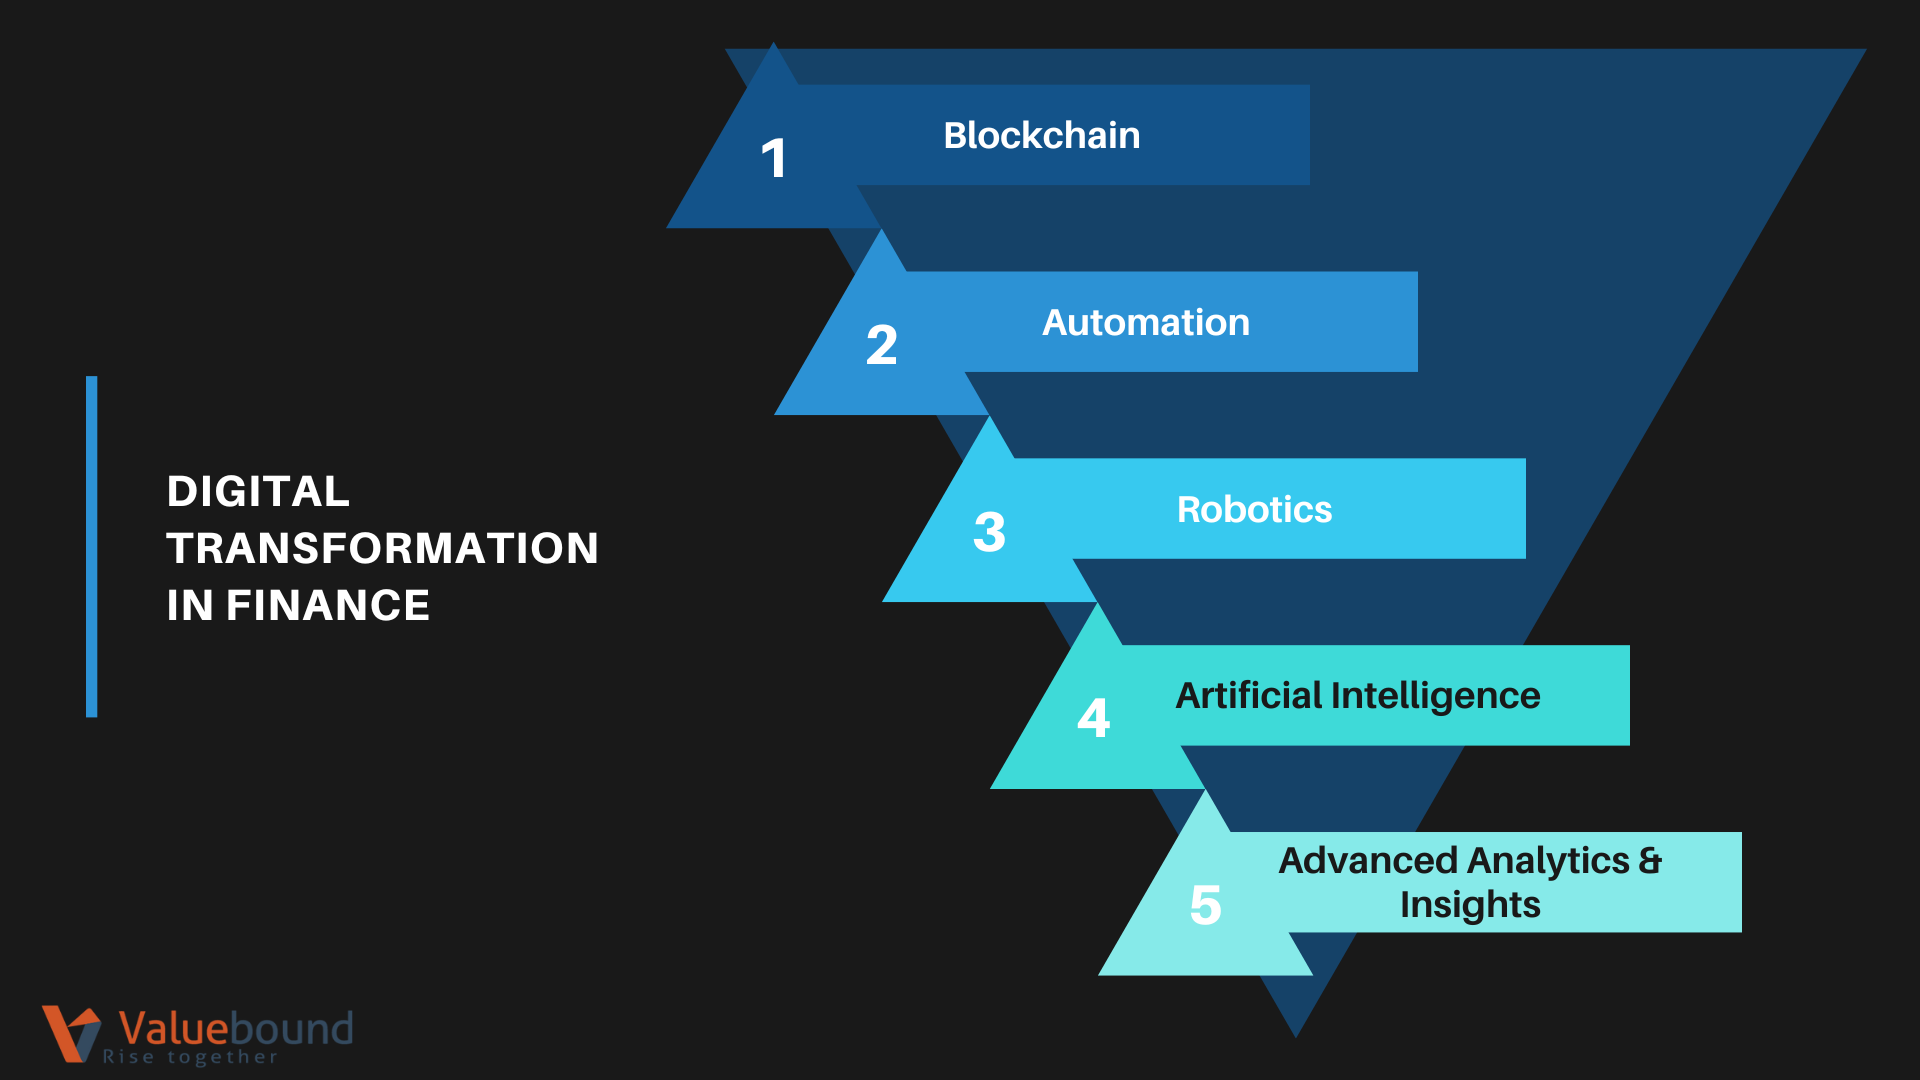
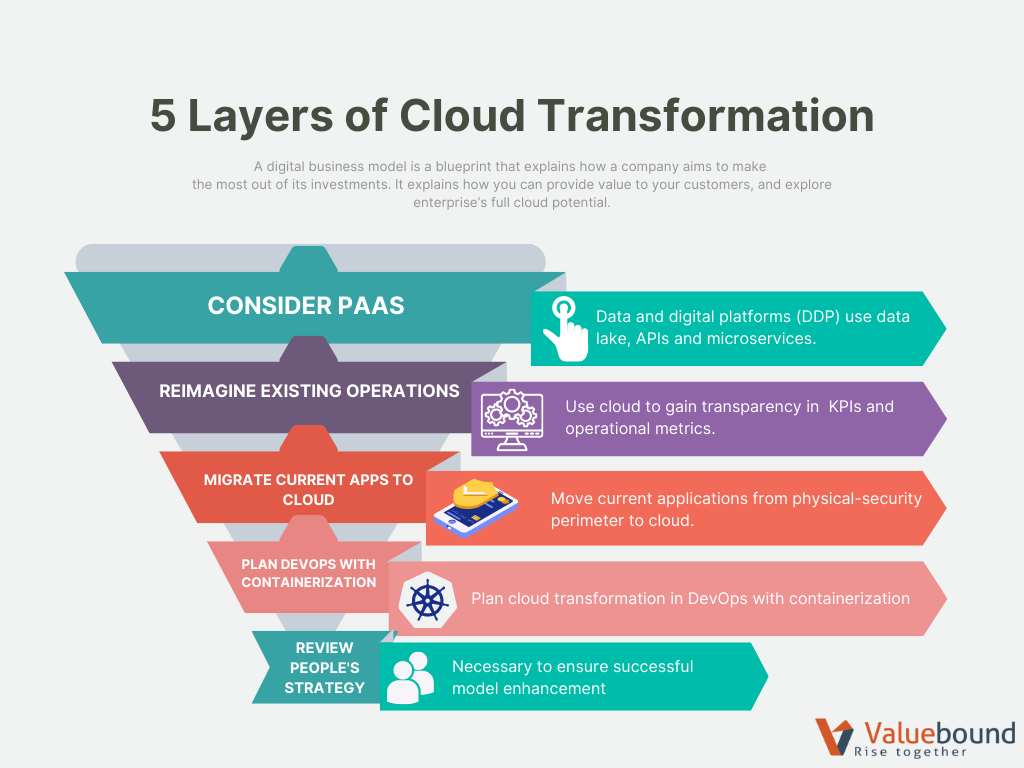
Top 5 strategic recommendations (Fig.1) to help you understand your enterprise’s full cloud potential are:
- Considering PaaS (platform as a service)
- Reimagining existing operations
- Migrating current applications from physical-security perimeter to cloud
- Planning cloud transformation with DevOps through containerization
- Reviewing people strategy to ensure successful model enhancement
Consider PaaS (Platform-as-a-Service)
Focusing your business investments in domains where the cloud helps in increasing revenues and margins is one area where financial companies can enable business-technology transformation. Data and Digital Platforms or DDP are among the crucial elements of driving cloud transformation for finance. DDP makes use of components like microservices, APIs, and a data lake, which allows companies to build applications in scalable and modular ways and gives them real-time data accessibility. Tech vendors can enable the processing and governance of DDPs through PaaS.
Cloud-native financial companies push code releases into production at a faster speed with the help of end-to-end automation. Automated cloud platforms help companies to release codes 100-1000X in a day, which helps them in meeting demands sooner, and get feedback faster. McKinsey suggests that the companies which adopt cloud platforms have 20-40% faster time-to-market for newer capabilities.
Reimagine existing operations
Businesses can reimage operations by adapting AI and natural language processing (NLP) which support digital customer service. Financial companies can also adopt optical character recognition (OCR) and robotic process automation (RPA) which streamline everyday processes like credit card processing, account closure, accounts payable, and report automation.
Cloud-first technologies can help employees in setting up operational metrics or KPIs, which offer higher transparency to the organization. Major cloud-service providers offer various native services which also provide access to the 3rd-party ecosystems. Such services have also evolved to move beyond the basic infrastructure, and include advanced functionality, such as data aggregation, facial recognition, and quantum computing.
Citing a real-world example, Rob Cameron, CEO of Barclays Payments says, “It’s about looking at how we can use technology to change processes to the benefit of the customer.” The company, for example, recently transformed its onboarding process. Rob Cameron says, “Our digital POD worked to build a better journey while also attacking the underlying questions set. Their work reduced the questions by 75% for new bank customers and by nearly 95% for existing bank customers.”
Barclays Payments now uses technology to inherit the remaining data across. The company had launched this digital initiative at the beginning of 2020, and to date, has seen call time reduction by 2/3rd, which indicates that agents are spending time on finding solutions for customers.
Migrate current applications to the cloud
Moving legacy systems to the cloud offers several benefits like improved performance, full compliance, and reduced license fees. Roughly 1/5th of the companies spend enough time and resources on building zero-trust applications which require no network perimeter. Many CIOs and CFOs opt for this model because this acts as a great combination of security, protection, and cost.
At the top level, companies can focus remediation on fixing compliances and security and later optimize the systems. Either this or they can also optimize all apps on the go. The kind of migrating path a financial company takes depends on the kind of risk they’re willing to underwrite. Migrating first, and optimizing later can help in breaking through the gridlock that several companies experience in cloud transformation. However, this approach needs company leadership to accept that some of the applications would cost more in the immediate run.
Top Leadership must define a clear strategy for replacing their legacy systems and leveraging the cloud for supporting existing business priorities. With clarity, you can also set a business case for those apps or workloads which will benefit the organization most with early migration.
A company requires the highest investment in rewriting the existing application into cloud-native platforms. This yields the most improvement in terms of agility and cost of ownership.
Rewriting an app for cloud-native requires the proprietary services of tech vendors. Some of the apps which were designed natively for cloud architecture can easily be configured to the present systems. However, such sophisticated plans require application developers and engineering skills, which financial companies struggle to have in-house. Having a mature full-stack DevOps tech vendor can build the cloud into your present legacy network design.
Plan cloud transformation with DevOps through containerization
“Containers are a way of packaging an application so that it’s easy to get the application and run it in any kind of environment. So, a lot of the complexity of installing and configuring an application is taken away. Containers let a developer abstract all of that and make a very simple package that’s easy to consume,” Tim Hynes from Rubrik, a cloud data management company defined containerization.
Through containerization, developers put together the tools, libraries, settings, code, and runtime engine in one package, and make it portable. This makes the software easy to be deployed in a cloud environment and needs fewer resources to function. Refactoring applications or software in containerization offers greater flexibility, sustainability, higher productivity, agility, and scalability. The payback period of most companies with this effort is no longer than 18 months, explains McKinsey.
Docker containers are aptly fit for DevOps because it allows the teams to break huge applications into microservices, which can then be rapidly updated or deployed. This provides quicker development velocity.
Planning cloud transformation with DevOps across apps and software with the use of containerization can also offer cost-efficiency. Designing and running containerization with pre-defined standards facilitates a predictable pathway that can also provide the repatriation of software or apps from one cloud to another during migration.
Review people's strategy
Successful cloud transformation in financial companies draws a parallel with other factors like people’s strategy. How will the organization change after digital transformation? What would be the new business model enhancements? What changes will be there in the organization’s structure? Business leaders would have to revisit business and IT amalgamation to support such a transformational shift. Since cloud innovation and transformation will bring in a natural change in the organizational chart, it would also be a good time to rethink and review how to adopt a culture with continuous learning or experimentation.
Key Takeaways
Cloud transformation in finance can scale up through vendor support so that various teams can unify on the recommended strategy suggested above. Automating infrastructure provisioning and application delivery with calculated risk assessment is possible through the continuous integration/ continuous delivery (CI/CD) approach, while also keeping security governance using DevOps in mind.
If you have an application migration or cloud deployment project that needs a hand, drop a hello to us to know how we have successfully converted codified blueprints to modern architectures with our unique product engineering capabilities.